

Dify アプリケーションをインポートする
このウォークスルーでは、Dify からエクスポートしたアプリケーション(OpenAI モデルを使うチャットアシスタント)を、記述されたままで、そのアプリケーションを載せた標準ライブラリの Dify インストールを Kubernetes 向けにビルドする Aggregate、Release、Manifest にインポートし、それらをビルドして結果を実行します。以下のすべてのファイルとすべての出力ブロックは実際の実行から得たものです。アプリケーションとウォークスルーの各段階は import-dify の例にあり、そこではチェックスクリプトがインポートを再度実行し、書き込んだ内容、出力した内容、およびこのページが引用するブロックを、そこに保存されたファイルと比較し、インポートが書き込んだものを検証してビルドします。
サンプルを生成する
このインポートは、このページのコマンドで実行することも、AI アシスタントに実行させることもできます。
例の名前を付けた新しいフォルダーに例を書き出します。
aggrega scaffold --example import-difyその後、次に実行するコマンドを表示します。最初のコマンドは新しいフォルダーに移動します。それに続く以下のコマンドは、新しいフォルダーの source フォルダーに移動します。このフォルダーには、このページがインポートするものが入っており、インポートはここで実行します:
cd import-dify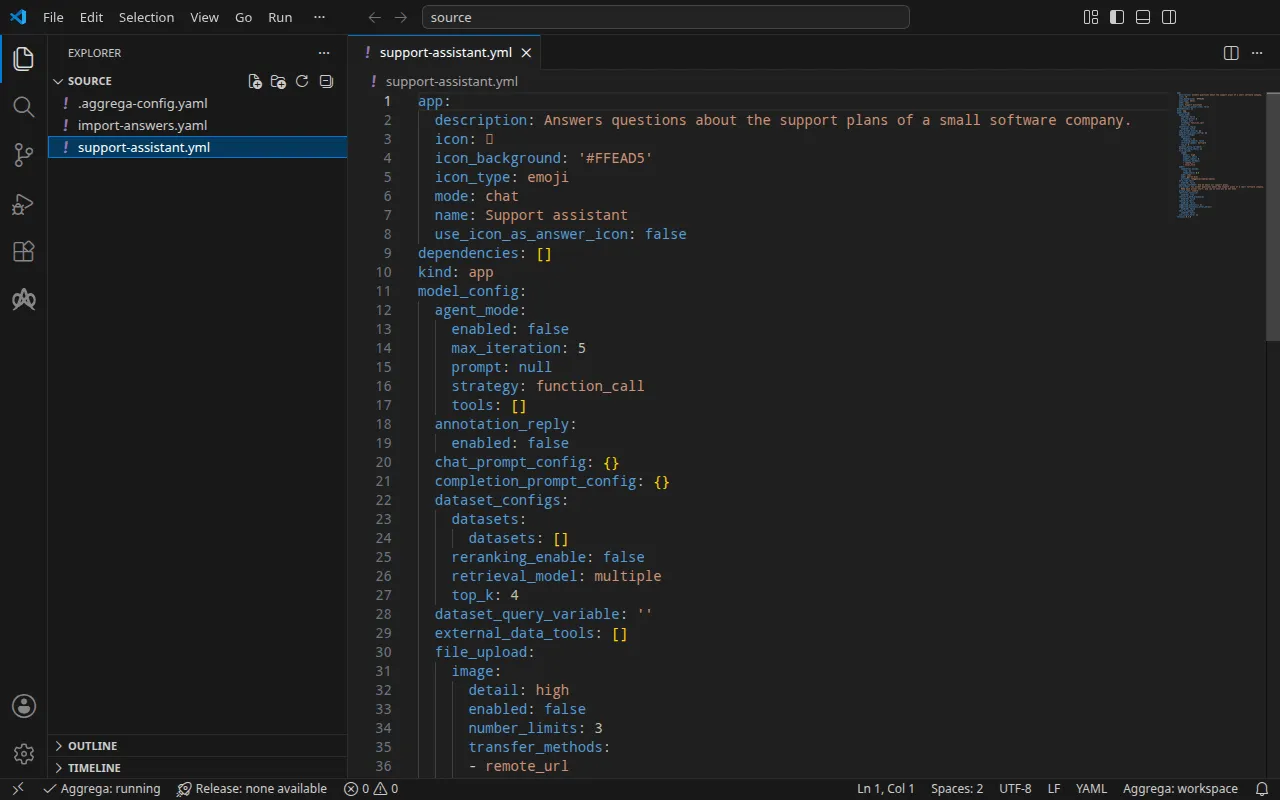
アプリケーション
このウォークスルーのために書かれた support-assistant.yml は、Dify の DSL(Dify がアプリケーション用にエクスポートする YAML)で書かれたチャットアプリケーションで、DSL バージョンは 0.7.0 です。内容は、冒頭の挨拶文、短いプロンプト、そして応答に使うモデル(プロバイダーで指定)です:
model: completion_params: stop: [] temperature: 0.4 mode: chat name: gpt-4o-mini provider: langgenius/openai/openaiその横にある .aggrega-config.yaml によって、フォルダーがワークスペースになります:
# The workspace key marks this directory as the workspace root, so an import run# here writes its drafts beside support-assistant.yml.workspace: {}# The registry the importer is fetched from the first time an import needs it.default_registry: hub.aggrega.aiそして import-answers.yaml には、どのアプリケーションにも保持できないものへの回答が入っています。インストールのアプリケーションシークレット(Dify がセッションの署名に使い、保存するモデルプロバイダーのキーの暗号化に使うキー)と、アプリケーションをインポートする所有者アカウントのメールアドレスとパスワードです。Kubernetes では各シークレットは Kubernetes Secret から読み取られるため、その回答はその Secret の名前です。Docker Compose の場合 に示すとおり、同じファイルは Docker Compose 向けのインポートにも使えます:
# Values the import could not draft from the source, keyed by the drafted file and the key path inside# it. Write each one beside its key; an import of the same source, and a sync, read them from here and# ask nothing. A secret is never written here: its key asks where the secret comes from — a variable# name, ${NAME}, or the name of a Kubernetes Secret.release.yaml: # Passed down to core/dify's secret_key parameter, which has no default; that parameter's description # in core/dify says what the value is. spec.parameters.secret_key: "dify-credentials" # Email address of the installation's owner account, read only when values.app_definition is set. The # step that imports the application creates this account when it performs Dify's first-time setup, and # signs in as it; on an installation whose setup has already run, it names an existing account allowed # to import applications, and the password attached to the owner_password slot is that account's. # Required when values.app_definition is set: the build halts when it is empty. It has no default. spec.boundaries.platform.aggregates.dify.components.api.infra.owner_email: "owner@example.com" # The origin of the secret value, written by the operator in the Release. Read exactly as # values.origin is. Write it here or in values.origin, never in both. A secret: name where it comes # from, never the value. spec.boundaries.platform.aggregates.dify.components.api.features.owner_password.infra.origin: "dify-owner"owner@example.com はご自身のメールアドレスを表します。dify-credentials と dify-owner は 実行する で作成する Secret です。このファイルがない場合、ターミナルでのインポートは 3 つの値をそれぞれ 1 問ずつ尋ね、回答を新しい回答ファイルに書き込みます。何も尋ねられない場合は、3 つのキーと空の回答を含むそのファイルを書き込み、それらを一覧表示して、ステータス 1 で終了します。インポート回答ファイル でこのファイルを詳しく説明しています。
ワークスペースはカタログフォルダーを指定していないため、インポートはインポーターの取得元であるレジストリから標準ライブラリのカタログを読み込みます。これは公開されたカタログの署名付きスナップショットで、最初のインポートが取得・検証してワークスペースのコンテンツキャッシュに保持し、インポートが下書きの隣に書き込む記録の中でそのダイジェストによって示されます。AGGREGA_CATALOG_DIRS または workspace.catalog_dirs で独自のカタログフォルダーを指定しているワークスペースは、代わりにそれらに対してインポートします。source に移動します:
cd sourceインポートを実行する
標準ライブラリの Dify インストールは Kubernetes と Docker Compose 上で実現されます。このウォークスルーでは helm ターゲットを指定します:
aggrega import support-assistant.yml --target helm標準出力には書き出したものが一覧表示されます:
wrote aggregate.yamlwrote release.yamlwrote manifest.yamlwrote .aggrega-import.json標準エラーには次のように出力されます(<workspace> は実行したフォルダーを表します):
[… omitted: a warning that the importer runs unverified, printed where its module is read from beside its Plugin entity in a catalog folder rather than fetched]read as the dify format, with drafted paths relative to <workspace>warn: node model_config.model (model) names the model "gpt-4o-mini" of the model provider "langgenius/openai/openai", whose credentials are set inside Dify, and core/ai-agent/dify configures that for itself rather than reaching it through a socket, so the draft wires no part for itmade no choice for model_config.model (model)Pull complete: <workspace>/release.lock (entities=25, source_artifacts=0, external_inputs=0)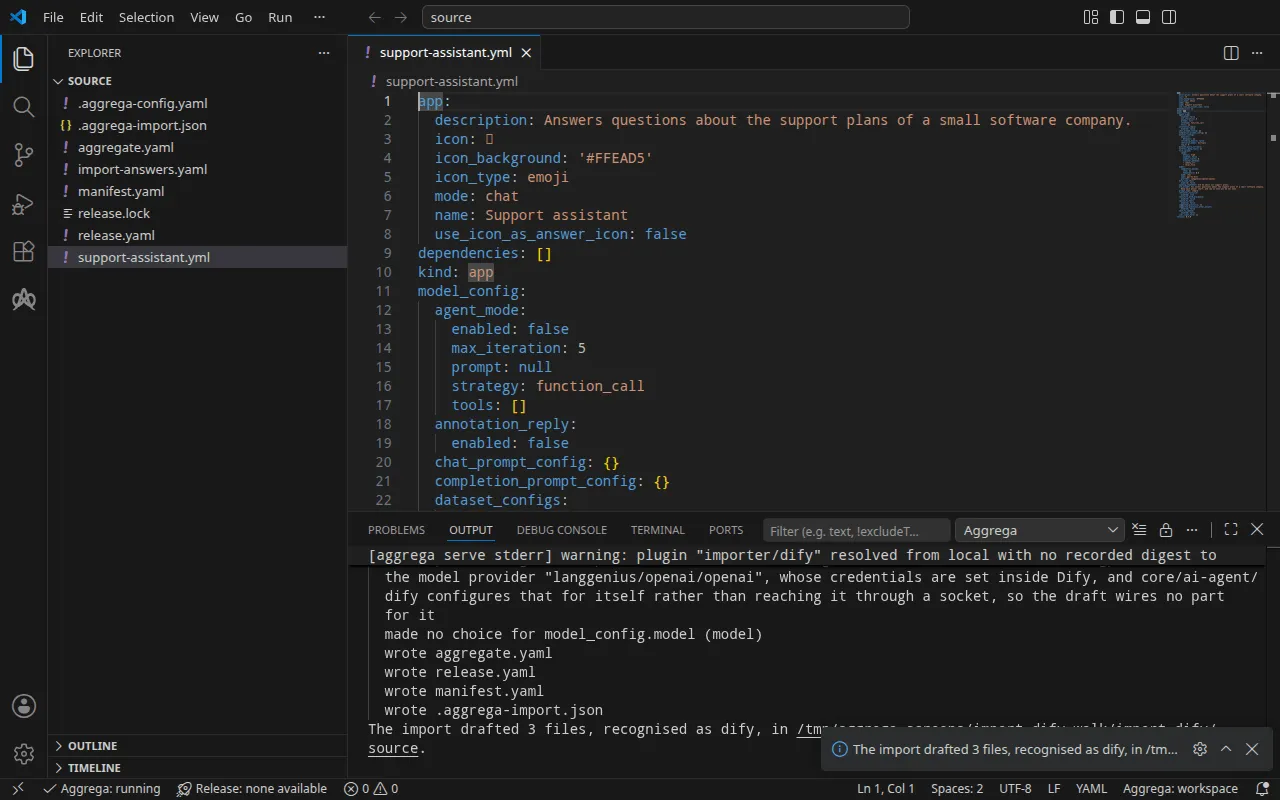
warn行は、モデルが Dify の内部にとどまることを示します。Dify はモデルプロバイダーとそのキーを自ら設定するため、下書きはモデルを接続しません。Dify が稼働したら、テストする に示すとおり、その OpenAI プロバイダーをインストールし、プロバイダーのキーを設定します。Pull completeの行はプルです。すべての値が回答ファイルから回答されたため、インポートはaggrega pullと同様に下書きされた Release の依存関係をプルし、release.lockを書き込みました。以下のビルドにはそれ以上何も必要ありません。
書き出される内容
Aggregate、Release、Manifest の名前は imported/support-assistant です。アプリケーションの名前、つまり app の下の Support assistant を support-assistant に縮めたものです。名前のないアプリケーションには、そのファイル名から名前が付きます。名前空間は、インポーターの target_namespace 設定が定めるもので、別のものを設定しない限り imported です(設定)。
aggregate.yaml — 標準ライブラリの Dify インストール core/dify。これは下書きが aggregates の下で構成する Aggregate であり、アプリケーションはその app_definition パラメーターに書かれたとおりに保持され(ここではその大部分を省略しています)、インストールの secret_key は下書きが宣言するパラメーターから渡されます:
apiVersion: aggrega.ai/v1beta1kind: Aggregatemetadata: name: imported/support-assistant version: 0.1.0 description: Draft Aggregate imported from a source in the dify format.spec: parameters: secret_key: type: string required: true minLength: 1 description: "Passed down to core/dify's secret_key parameter, which has no default; that parameter's description in core/dify says what the value is." aggregates: # An import sees the Components of the workspace's catalog and none of its Aggregates, so it does not check that the catalog holds core/dify. dify: type: core/dify parameters: secret_key: "{{ .parameters.secret_key }}" app_definition: | app: description: Answers questions about the support plans of a small software company. [… omitted: the rest of the application, as exported] version: 0.7.0このインストールは、互いに接続された 10 個のコンポーネント(Dify の API サーバー、ワーカー、スケジューラー、Web フロントエンド、コードサンドボックス、プラグインランタイム、エグレスプロキシ、PostgreSQL、Redis 互換キャッシュ、Weaviate)で構成され、アプリケーションのインポートは、その API サーバーの Recipe がレンダリングする 1 つのステップです。そのアプリケーションシークレットには core/dify にデフォルトがありません。そのため下書きは secret_key をデフォルトなしの独自のパラメーターとして宣言し、Release が満たせるように下へ渡します。インストールのその他の認証情報は、実行するで説明するとおり、core/dify が与えるデフォルトのままです。
release.yaml — Release です。インストールを境界 platform にルーティングし、アプリケーションが提供できないものを回答ファイルから満たします:
apiVersion: aggrega.ai/v1beta1kind: Releasemetadata: name: imported/support-assistant # environment is a drafted default, since no source names the environment this Release deploys to; change it to name the one it deploys to. environment: development version: 0.1.0 description: Draft Release imported from a source in the dify format.spec: aggregate: imported/support-assistant manifest: imported/support-assistant parameters: # Left for the Release, since the source cannot supply it: secret_key, which the drafted Aggregate declares and passes down to core/dify; that parameter's description there says what the value is secret_key: "dify-credentials" boundaries: platform: aggregates: dify: components: api: infra: # Lets the installation reach Dify's plugin marketplace, which the plugin serving the application's model, such as OpenAI's, is installed from. marketplace_enabled: true # Left for the Release, since the source cannot supply it: components.api.infra.owner_email, the email of the installation's owner account the application is imported under, on the api component of core/dify owner_email: "owner@example.com" features: owner_password: type: core/referenced-secret infra: # Left for the Release, since the source cannot supply it: the name of a Kubernetes Secret already in the namespace holding, under the data key value, the owner account's password. origin: "dify-owner" worker: infra: # Lets the installation reach Dify's plugin marketplace, which the plugin serving the application's model, such as OpenAI's, is installed from. marketplace_enabled: true scheduler: infra: # Lets the installation reach Dify's plugin marketplace, which the plugin serving the application's model, such as OpenAI's, is installed from. marketplace_enabled: trueenvironmentはdevelopmentです。これはデフォルトであり、その上のコメントは、Release のデプロイ先の環境に変更するよう指示しています。secret_keyは、アプリケーションシークレットを保持する Secret の名前dify-credentialsで、インストールが指定するデータキーsecret-keyの下にあります。Manifest は、すべての認証情報を名前空間にすでにある Secret から読み取ります。- オーナーアカウントは、インストールを境界に配置するルーティングエントリで、インストールの
apiコンポーネントに設定されます。設定するのはそのメールアドレスと、core/referenced-secretとしてアタッチされたパスワードで、後者はパスワードをデータキーvalueの下に保持する Secretdify-ownerを指定します。回答された値の上のコメントは、インポートがそれらを下書きできなかった理由を説明しています。 marketplace_enabledは、すべてのターゲットで、API サーバーapi、そのワーカー、そのスケジューラーでtrueです。Release が許可しない限り、インストールは Dify のベンダーの何にもアクセスしません。アプリケーションが応答に使う OpenAI プロバイダーは、テストするで示すとおり、Dify がプラグインマーケットプレイスからインストールするプラグインです。3 つはそれぞれ自身の設定を読み取ります。
manifest.yaml — インストールが構成する各コンポーネントの Helm Recipe と、名前空間にすでにある Secret から認証情報を読み取る実現です:
apiVersion: aggrega.ai/v1beta1kind: Manifestmetadata: name: imported/support-assistant version: 0.1.0spec: mappings: components: type: core/datastore/postgres: helm/postgres core/datastore/redis: helm/redis core/datastore/weaviate: helm/weaviate core/ai-agent/dify-ssrf-proxy: helm/dify-ssrf-proxy core/ai-agent/dify-sandbox: helm/dify-sandbox core/ai-agent/dify-plugin-daemon: helm/dify-plugin-daemon core/ai-agent/dify: helm/dify core/ai-agent/dify-worker: helm/dify-worker core/ai-agent/dify-worker-beat: helm/dify-worker-beat core/ai-agent/dify-web: helm/dify-web features: type: core/referenced-secret: helm/k8s-existing-secret--target は、下書き自身のコンポーネントタイプに加えて、下書きが構成するインストールのコンポーネントタイプもマッピングします。PostgreSQL のように、カタログが 1 つのタイプに複数の Helm Recipes を提供する場合は、タイプにちなんで名付けられたもの、helm/postgres をマッピングします。
.aggrega-import.json はインポートが書き込んだ内容の記録で、後の aggrega import --sync がこれを読み取ります。release.lock は、Release が解決するすべてのカタログエンティティをバージョンとダイジェストで固定します。
検証とビルド
aggrega validate --release release.yamlaggrega build --release release.yaml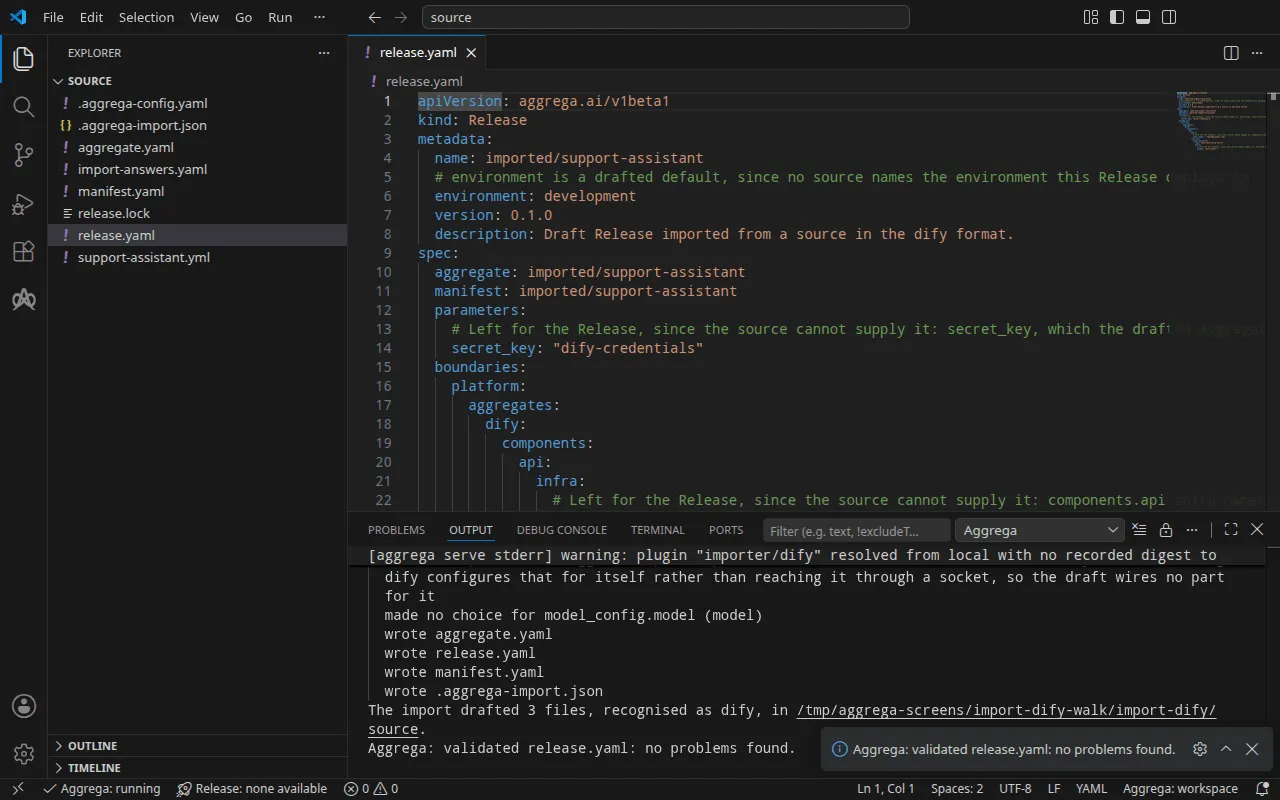
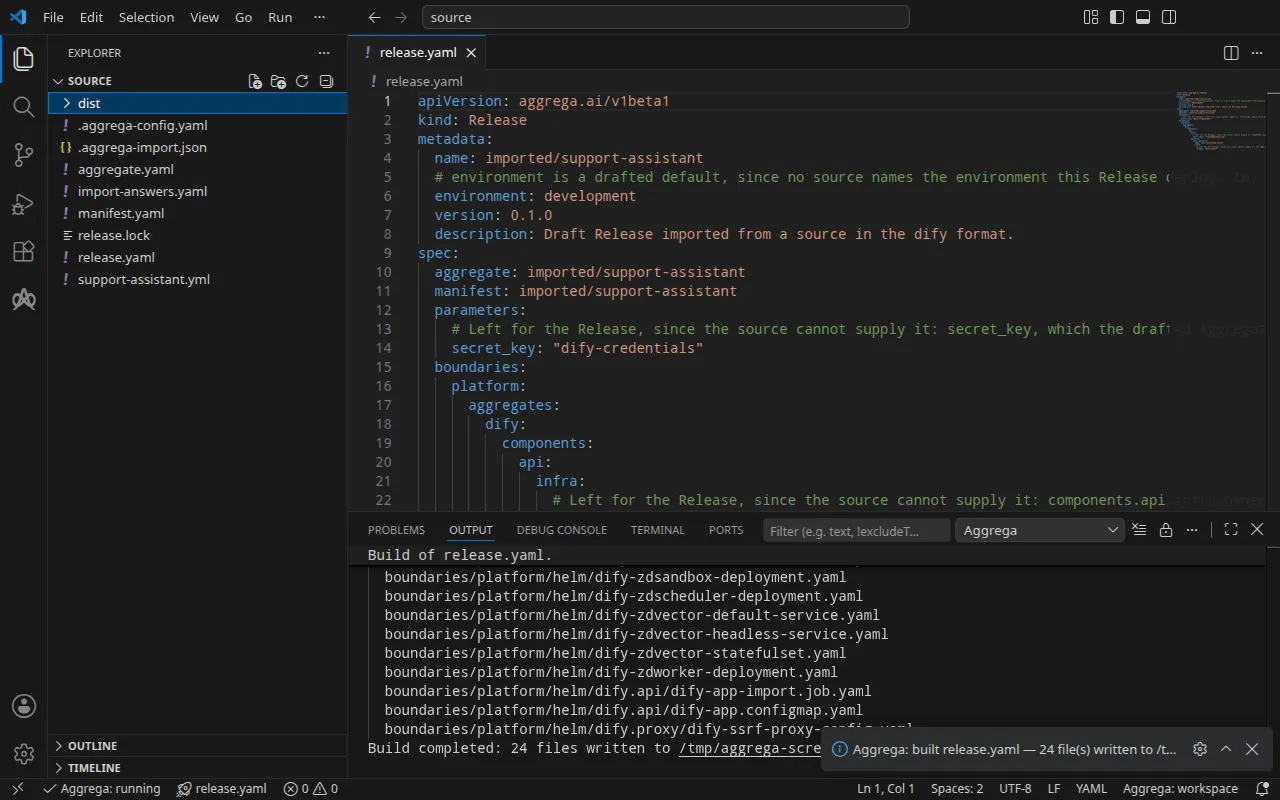
検証の出力は次のとおりです:
notice: LINT: Feature "core/referenced-secret" at core/referenced-secret:1.0.0 declares property "origin" in both values: and infra: pillars (path: origin)release dependency validation passed: release.yaml (schema-pillar + dependency pillars)そしてビルドの出力です(<workspace> は下書きがあるフォルダーを表します):
notice: LINT: Feature "core/referenced-secret" at core/referenced-secret:1.0.0 declares property "origin" in both values: and infra: pillars (path: origin)[… omitted: a total build time, which differs per run]Build completed: 24 files written to <workspace>/distnotice 行は助言です。シークレット Feature は origin を Aggregate の values または Release の infra から受け付け、この通知は 1 つのリーフが両方で宣言されていることを報告しています。判定は何も変わりません。
ビルドは、インストールの Kubernetes マニフェストを dist/boundaries/platform/helm/ の下に書き込みます。その中に、アプリケーションをインポートする Job dify.api/dify-app-import.job.yaml があります。この Job は Dify の API サーバーが応答するのを待ち、初回セットアップが未実行であれば Release が指定するオーナーアカウントとして Dify の初回セットアップを実行し、アプリケーションをインポートします:
spec: podFailurePolicy: rules: - action: FailJob onExitCodes: containerName: import operator: In values: [2] template: spec: restartPolicy: Never containers: - name: import image: "langgenius/dify-api:1.17.0" command: ["python", "/seed/import.py"] env: - name: DIFY_API_URL value: "http://dify-zdapi-default:5001" - name: OWNER_EMAIL value: "owner@example.com" - name: OWNER_PASSWORD valueFrom: secretKeyRef: name: "dify-owner" key: "value" volumeMounts: - name: seed mountPath: /seed readOnly: true volumes: - name: seed configMap: name: dify-zdapi-appアプリケーション自体は、その隣の ConfigMap にあります。Dify がこのステップの送信内容を拒否した場合、つまりリクエストタイムアウトやレート制限以外のクライアントエラー応答を返した場合や、インポートの失敗を報告した場合、ステップは Dify の応答に含まれるメッセージを出力してステータス 2 で終了します。定義が app.name の下にアプリケーションを指定していない場合も同様です。再試行しても同じように拒否されるため、Job の podFailurePolicy はその試行の時点で Job を失敗させます。サーバーが約 10 分以内に応答しない場合など、それ以外の失敗は再試行されます。
AI アシスタントを使う
Aggrega のツールでセットアップした AI アシスタントでも同じことができます。次のプロンプトを貼り付けてください。
Aggrega のツールだけを使い、自分ではフォルダーを作成しないでください。Workspace フォルダーにまだ `import-dify` フォルダーがない場合は、`example` を `import-dify` に設定し、`dir` を指定せずに `scaffold` ツールを 1 回呼び出してください。これにより例が新しい `import-dify` フォルダーに書き込まれ、その `source` フォルダーにこのページでインポートするものが入ります。次に、`workspace_root` を `import-dify/source`、`source` を `support-assistant.yml`、`target` を `helm` に設定して `import` ツールを呼び出してください。このツールは必要な回答を `support-assistant.yml` の横にある `import-answers.yaml` から読み取り、下書きを `import-dify/source` に書き込み、下書きに必要なものをプルします。次に、`workspace_root` を `import-dify/source`、`release` を `release.yaml` に設定して `validate` ツールを呼び出し、`workspace_root` を `import-dify/source`、`release` を `release.yaml`、`write` を true に設定して `build` ツールを呼び出してください。ビルドが書き込んだファイルを教えてください。ファイルは `import-dify/source/dist/` の下にあります。VS Code で開く
Visual Studio Code 用の Aggrega 拡張機能をインストールした状態で、インポートが下書きを書き込んだフォルダー import-dify/source を VS Code で開きます。このフォルダーには Release が 1 つ、下書きの release.yaml だけがあるため、エディターがそれを自動的に選択します。Docker Compose の場合で 2 つ目の Release を compose に下書きした後は、Aggrega: Select Release… でエディターが扱うものを選びます。エディターは下書きを編集するたびに選択した Release に照らしてチェックし、見つけたものをファイル内と「問題」パネルに表示します。コマンドパレットの Aggrega: Show topology graph は、選択した Release のコンポーネントとそれらの間の接続を描画します。Aggrega: Build、Aggrega: Preview build、Aggrega: Pull は同じ Release に対して動作し、それぞれアクティビティバーの Aggrega ビューにある Commands パネルのボタンでもあります。Build はファイルをフォルダーの dist/ に書き込みます。その他については Visual Studio Code で Aggrega を使う を参照してください。
実行する
マニフェストを適用する前に、マニフェストが読み取る Secret を作成します。存在しない Secret を指定するワークロードは起動しません。そのうち 2 つは回答ファイルが指定した内容を保持します。所有者のパスワードを value の下に保持する dify-owner と、アプリケーションのシークレットを secret-key の下に保持する dify-credentials です。インストールの残り 4 つの認証情報(データベースのパスワードと、そのコンポーネントが互いに提示する 3 つのキー)は core/dify が与えるデフォルトのままで、Kubernetes では各デフォルトが、マニフェストがその値を読み取る Secret の名前になります。db-password の下の dify-db-password-for-evaluation-only、code-execution-key の下の dify-code-execution-key-for-evaluation-only、plugin-daemon-key の下の dify-plugin-daemon-key-for-evaluation-only、inner-api-key の下の dify-inner-api-key-for-evaluation-only です。この 4 つも、それぞれ独自の値を保持させて作成します。別の名前の Secret から読み取るには、Aggregate の dify エントリの parameters の下で、db_password、code_execution_key、plugin_daemon_key、inner_api_key として名前を core/dify に渡します。
後でこのパスワードでサインインするため、所有者のパスワードをシェルで DIFY_OWNER_PASSWORD として設定します。Dify が受け付ける所有者パスワードは、英字と数字を含む 8 文字以上のものです。それ以外を与えると、Dify が初回セットアップを拒否した時点でインポート Job は失敗し、そのログには first-time setup was refused with HTTP 422: Validation error for parameter 'payload' と表示されます。これは、Dify が拒否する所有者アカウントに返す応答です。後述の待機は Job の完了を待ちますが、失敗した Job は決して完了しないため、その場合はタイムアウトまで続きます。その横の 2 つ目のターミナルで kubectl wait --for=condition=failed job/dify-zdapi-app-import --timeout=15m を実行すると、その待機は Job が失敗した時点で戻ります。Job と dify-owner Secret を削除し、Dify が受け付けるパスワードで Secret を作成し直して、もう一度適用します。
残り 5 つの Secret のそれぞれについて、1 行を保持するファイルを 1 つずつ書きます。その行はデータキー、=、独自の値からなります。dify-credentials.env には secret-key=、db-password.env には db-password=、code-execution-key.env には code-execution-key=、plugin-daemon-key.env には plugin-daemon-key=、inner-api-key.env には inner-api-key= です。その後、6 つの Secret を作成します。これで値はクラスターが保持するため、ファイルを削除します:
printf 'value=%s\n' "$DIFY_OWNER_PASSWORD" > dify-owner.envkubectl create secret generic dify-owner --from-env-file=dify-owner.envkubectl create secret generic dify-credentials --from-env-file=dify-credentials.envkubectl create secret generic dify-db-password-for-evaluation-only --from-env-file=db-password.envkubectl create secret generic dify-code-execution-key-for-evaluation-only --from-env-file=code-execution-key.envkubectl create secret generic dify-plugin-daemon-key-for-evaluation-only --from-env-file=plugin-daemon-key.envkubectl create secret generic dify-inner-api-key-for-evaluation-only --from-env-file=inner-api-key.envrm dify-owner.env dify-credentials.env db-password.env code-execution-key.env plugin-daemon-key.env inner-api-key.envインポートの実行方法 の実行ステップで説明しているとおりにマニフェストを適用し — -R によって dify.api/ と dify.proxy/ 内の Job と 2 つの ConfigMap にも届きます — 、その後インポート Job を待ってそのログを読み、プラグインランタイムを待ちます:
kubectl apply -R -f dist/boundaries/platform/helm/kubectl wait --for=condition=complete job/dify-zdapi-app-import --timeout=15mkubectl logs job/dify-zdapi-app-importkubectl rollout status statefulset/dify-zdpluginsservice/dify-zdapi-default createddeployment.apps/dify-zdapi created[… omitted: a line for each of the other Services, Deployments and StatefulSets]job.batch/dify-zdapi-app-import createdconfigmap/dify-zdapi-app createdconfigmap/dify-zdproxy-config createdjob.batch/dify-zdapi-app-import condition metfirst-time setup done: owner account owner@example.comimported 'Support assistant' as application 7e03e85c-b13f-4ddc-b539-040470a61d4cpartitioned roll out complete: 1 new pods have been updated...ログにはアプリケーションの識別子が示され、これは テストする で必要になります。
テストする
Dify の API は http://127.0.0.1:5001 で応答します。Kubernetes では、適用先の名前空間にある API サーバーの Service dify-zdapi-default にローカルポートを転送し、2 つ目のターミナルでそのコマンドを実行したままにします:
kubectl port-forward -n <namespace> svc/dify-zdapi-default 5001:5001Docker Compose で Docker Compose の場合 に示すとおりに起動した場合、Release はすでにそのアドレスで API を公開し、http://127.0.0.1:3001 でコンソールを公開しています。コンソールのサインインページ http://127.0.0.1:3001/signin を開きます。/ はそこにリダイレクトします。ページはリクエストを http://127.0.0.1:5001 の API に送り、Dify の API がブラウザーに応答するのは、下書きの console_url が示すアドレス http://127.0.0.1:3001 から配信されたページに対してだけなので、そこで所有者としてサインインします。それ以外のアドレスで開いた場合、コンソールのリクエストにはそのような応答が返らず、ブラウザーはすべての応答を拒否します。コンソールを別のポートで公開する場合は、あわせて console_url を変更してください。
アプリケーションは API を通じても応答し、ブラウザーは関与しません。DIFY_OWNER_PASSWORD を設定したターミナルで、所有者としてサインインします。コンソール API はパスワードを Base64 エンコードで受け取り、サインインするとセッションが cookies.txt に残ります。以降のコンソールリクエストはすべて、同じファイルの CSRF トークンを X-CSRF-Token ヘッダーに入れてセッションを送り返します。これがないリクエストは CSRF token is missing or invalid. で拒否されます。
printf '{"email": "owner@example.com", "password": "%s"}' "$(printf %s "$DIFY_OWNER_PASSWORD" | base64 | tr -d '\n')" | curl -sS -c cookies.txt http://127.0.0.1:5001/console/api/login -H 'Content-Type: application/json' -d @-CSRF=$(awk '$6 == "csrf_token" {print $7}' cookies.txt){"result":"success"}Dify のモデルプロバイダーはプラグインであり、新しいインストールには 1 つも含まれていません。この実行でインストールしたバージョンである 1.1.0 の、Dify の OpenAI プロバイダーをインストールします。プラグインランタイムはそれを、下書きの marketplace_enabled によってインストールから到達できるようになっている Dify のマーケットプレイスから取得するため、インストールはインターネットに到達できる必要があります:
curl -sS -b cookies.txt -H "X-CSRF-Token: $CSRF" -H 'Content-Type: application/json' \ http://127.0.0.1:5001/console/api/workspaces/current/plugin/install/marketplace \ -d '{"plugin_unique_identifiers": ["langgenius/openai:1.1.0@1ded02acee56efd5788c86fd447d792e4923e959554a4942f440c7859d164340"]}'{"all_installed":false,"task_id":"01a1dc0a-653d-756b-a104-e5d6d1e43695","task":null}Release から marketplace_enabled を削除すると、Dify は代わりにリクエストを {"code":"invalid_param","message":"marketplace is not enabled","status":400} で拒否します。インストールはバックグラウンドで実行されます。応答が示す task_id を使って、status が success になるまでそのタスクを問い合わせます:
curl -sS -b cookies.txt -H "X-CSRF-Token: $CSRF" \ http://127.0.0.1:5001/console/api/workspaces/current/plugin/tasks/<task id>{"task":{"id":"01a1dc0a-653d-756b-a104-e5d6d1e43695",[… omitted: when it was created and last updated],"status":"success","total_plugins":1,"completed_plugins":1,"plugins":[{"plugin_unique_identifier":"langgenius\/openai:1.1.0@1ded02acee56efd5788c86fd447d792e4923e959554a4942f440c7859d164340",[… omitted: the plugin's status, its icon and its names in four languages]}]}}プロバイダーのキーを openai.json に {"credentials": {"openai_api_key": "your OpenAI key"}} の形で書き込み、設定してから、ファイルを削除します:
curl -sS -b cookies.txt -H "X-CSRF-Token: $CSRF" -H 'Content-Type: application/json' \ http://127.0.0.1:5001/console/api/workspaces/current/model-providers/langgenius/openai/openai/credentials \ -d @openai.jsonrm openai.jsonDify はキーを保存する前にプロバイダーへ 1 回リクエストを送ってキーを確認し、プロバイダーが受け入れたキーには {"result":"success"} と応答します。この実行ではプレースホルダーを設定したため、Dify は OpenAI の回答とともにそれを拒否しました:
{"code":"invalid_param","message":"Error code: 401 - {'error': {'message': 'Incorrect API key provided: sk-place*****************-key. You can find your API key at https:\/\/platform.openai.com\/account\/api-keys.', 'type': 'invalid_request_error', 'code': 'invalid_api_key', 'param': None}, 'status': 401}","status":400}アプリケーションは、そのアプリケーション専用の API キーで行われたリクエストに応答します。アプリケーションをインポートするステップのログにあるアプリケーションの識別子を使って、キーを 1 つ作成します。Docker Compose では docker compose -p support-assistant -f ../dist/boundaries/platform/compose/docker-compose.yaml logs dify-zdapi-app-import で確認できます:
curl -sS -X POST -b cookies.txt -H "X-CSRF-Token: $CSRF" \ http://127.0.0.1:5001/console/api/apps/<application id>/api-keys{"id":"8d6c1eb1-cf61-4825-9b04-f32689ed0489","type":"app","token":"[… omitted: the key]","last_used_at":null,"created_at":1794693042}そして、キー、つまり応答の token を使ってアプリケーションにメッセージを送ります:
curl -sS http://127.0.0.1:5001/v1/chat-messages \ -H 'Authorization: Bearer <app key>' -H 'Content-Type: application/json' \ -d '{"inputs": {}, "query": "In one short sentence: what does a support plan cover?", "response_mode": "blocking", "user": "test-it"}'プレースホルダーが拒否されたため、モデルにはキーがなく、Dify はそのことを伝えます:
{"code":"provider_not_initialize","message":"Model gpt-4o-mini credentials is not initialized.","status":400}Kubernetes と Docker Compose での実行では同じ応答が得られました。プロバイダーが受け入れるキーがあれば、応答の answer にモデルの回答が入ります。
Kubernetes では、ポートフォワードを停止してから、適用したもの、Secret、セッションファイルを削除します:
kubectl delete -R -f dist/boundaries/platform/helm/kubectl delete secret dify-owner dify-credentials dify-db-password-for-evaluation-only dify-code-execution-key-for-evaluation-only dify-plugin-daemon-key-for-evaluation-only dify-inner-api-key-for-evaluation-onlykubectl delete pvc data-dify-zddb-0 storage-dify-zdplugins-0 data-dify-zdvector-0rm cookies.txtKubernetes は、StatefulSet が削除されても、その StatefulSet が作成したボリュームクレームを保持します。そのため 3 つ目のコマンドでそれらを削除し、あわせてデータベース、インストールしたプラグイン、ベクトルストアも削除します。Docker Compose では、docker compose -p support-assistant -f ../dist/boundaries/platform/compose/docker-compose.yaml down -v でスタックとそのボリュームを削除します。
Docker Compose の場合
同じアプリケーションは、同じ回答ファイルを使い、compose ターゲットで Docker Compose 向けにインポートできます。Kubernetes 向けの下書きはすでに source にあるため、Compose 向けの下書きは --output-dir で専用のフォルダーに書き込みます。それでもインポートはアプリケーションの横にある回答ファイルを読み取ります:
aggrega import support-assistant.yml --target compose --output-dir composeDocker Compose には指定する Secret がないため、compose では下書き自体がアプリケーションのシークレットと所有者のパスワードを書き込みます。どちらも、スタックを起動する人の環境から Docker Compose が値を埋める変数参照として書き込まれます。そこで必要なのは所有者のメールアドレスだけです。インポートは 2 つの Secret 名を適用せずに回答ファイルに残し、そのことを標準エラーに出力します:
info: the answers file <workspace>/import-answers.yaml also answers spec.boundaries.platform.aggregates.dify.components.api.features.owner_password.infra.origin in release.yaml, spec.parameters.secret_key in release.yaml, which these drafts do not leave empty; those answers are kept there and not applied下書きの Release は、アプリケーションのシークレットを DIFY_SECRET_KEY から、所有者のパスワードを DIFY_OWNER_PASSWORD から読み取り、ループバックアドレスのポート 5001 で API を、3001 でフロントエンド console を公開します:
parameters: # Passed by reference, never as a value: secret_key, which the drafted Aggregate declares and passes down to core/dify; that parameter's description there says what the value is; it is read from the variable DIFY_SECRET_KEY, which a target substituting variable references, as Docker Compose does when the stack starts, reads from the environment, so no file carries the value. secret_key: "${DIFY_SECRET_KEY}" [… omitted: the boundary, the marketplace switch, and the owner's email, answered as above] # Published on this machine's loopback address, 127.0.0.1: reachable from this machine only, by any process running on it. Delete this line to keep the service internal. published_port: 5001 console_url: "http://127.0.0.1:3001" features: owner_password: type: core/referenced-secret infra: # Attached by reference, never as a value: the owner account's password, read from the variable DIFY_OWNER_PASSWORD, which a target substituting variable references, as Docker Compose does when the stack starts, reads from the environment, so no file carries the value. origin: "${DIFY_OWNER_PASSWORD}" [… omitted: the worker and the scheduler, each with the marketplace switch, as above] console: infra: # Published on this machine's loopback address, 127.0.0.1: reachable from this machine only, by any process running on it. Delete this line to keep the service internal. published_port: 3001コメントにあるとおり、各ポートには自分のマシンからしか到達できず、行を削除するとそのサービスはスタックのネットワーク上だけに置かれます。フロントエンドはコンテナ内で 3000 をリッスンし、3001 で公開されるため、3000 を公開する別の例と並べて実行できます。API サーバーの console_url はフロントエンドが公開されるアドレスなので、フロントエンドのポートを変更した場合はそこも変更します。
Manifest は各コンポーネントをその Compose Recipe に、core/referenced-secret を compose/dotenv-referenced-secret に対応付けます。後者は各参照をそのまま Compose ファイルに書き込みます。新しいフォルダーから検証してビルドします:
cd composeaggrega validate --release release.yamlaggrega build --release release.yamlビルドはワークスペースのルートにある dist の下に書き込み、ワークスペースは引き続き .aggrega-config.yaml を含むフォルダーである source です。Compose ファイルは source/dist/boundaries/platform/compose/docker-compose.yaml で、compose から見ると ../dist/boundaries/platform/compose/docker-compose.yaml になり、compose の中に dist フォルダーは書き込まれません。このファイルには、どちらの値でもなく SECRET_KEY: ${DIFY_SECRET_KEY} と OWNER_PASSWORD: ${DIFY_OWNER_PASSWORD} が含まれます。スタックを起動する前に、両方の変数をシェルで、または Compose ファイルの横の .env ファイルで設定します。
インストールの残り 4 つの認証情報は core/dify が与えるデフォルトのままで、Docker Compose では各デフォルトが値そのものとして Compose ファイルにそのまま書き込まれます。DB_PASSWORD: dify-db-password-for-evaluation-only で、データベース側の POSTGRES_PASSWORD も同じです。同様に dify-code-execution-key-for-evaluation-only、dify-plugin-daemon-key-for-evaluation-only、dify-inner-api-key-for-evaluation-only もあります。カタログを読む人は誰でもこれらのデフォルトを知っているため、評価用途にしか使えません。いずれかを置き換えるには、下書きの Aggregate でその値の文字列パラメーターを宣言し、下書きが secret_key を渡すのと同じように、dify エントリの parameters で core/dify が使う名前(db_password、code_execution_key、plugin_daemon_key、inner_api_key のいずれか)で渡し、Release の parameters で値を満たします。db_password: "${DIFY_DB_PASSWORD}" と書いた Release は、DB_PASSWORD: ${DIFY_DB_PASSWORD} と POSTGRES_PASSWORD: ${DIFY_DB_PASSWORD} を含む Compose ファイルをビルドし、これらは上の 2 つと同じく環境から埋められます。
実行する で説明しているとおり、Dify が受け入れる所有者パスワードを使って compose からスタックを起動します:
export DIFY_SECRET_KEY='a long random value of your own'export DIFY_OWNER_PASSWORD='a password of your own'docker compose -p support-assistant -f ../dist/boundaries/platform/compose/docker-compose.yaml up -d --waitこの実行では、すべてのサーバーが正常と報告した時点で、--wait は約 1 分で戻りました。アプリケーションをインポートするステップはそれらと並行して実行され、インポートを終えると終了します。その後、ログは次のようになります:
first-time setup done: owner account owner@example.comimported 'Support assistant' as application 7fae73f4-826b-4918-a623-a3383aa0da8cテストする では、公開された 2 つのポートでインストールにアクセスします。