

Dify 애플리케이션 가져오기
이 안내에서는 Dify에서 내보낸 애플리케이션(OpenAI 모델 기반의 채팅 어시스턴트)을, 작성된 그대로 그 애플리케이션을 담은 표준 라이브러리의 Dify 설치를 Kubernetes용으로 빌드하는 Aggregate, Release, Manifest로 가져온 다음, 이들을 빌드하고 결과를 실행합니다. 아래의 모든 파일과 모든 출력 블록은 실제 실행에서 나온 것입니다. 애플리케이션과 안내의 각 단계는 import-dify 예제에 있으며, 그곳의 검사 스크립트가 가져오기를 다시 실행하고, 그것이 쓰는 내용, 출력하는 내용, 이 페이지가 인용하는 블록을 그곳에 보관된 파일과 비교하며, 가져오기가 쓴 것을 검증하고 빌드합니다.
예제 생성하기
이 페이지의 명령으로 이 가져오기를 실행하거나, AI 어시스턴트가 대신 실행하게 할 수 있습니다.
예제 이름을 딴 새 폴더에 예제를 씁니다:
aggrega scaffold --example import-dify그런 다음 이어서 실행할 명령을 출력합니다. 첫 번째 명령은 새 폴더로 이동합니다. 그 뒤의 명령은 아래와 같으며, 새 폴더 안의 source 폴더로 이동합니다. 이 폴더에는 이 페이지가 가져오는 내용이 들어 있으며, 가져오기는 여기서 실행됩니다:
cd import-dify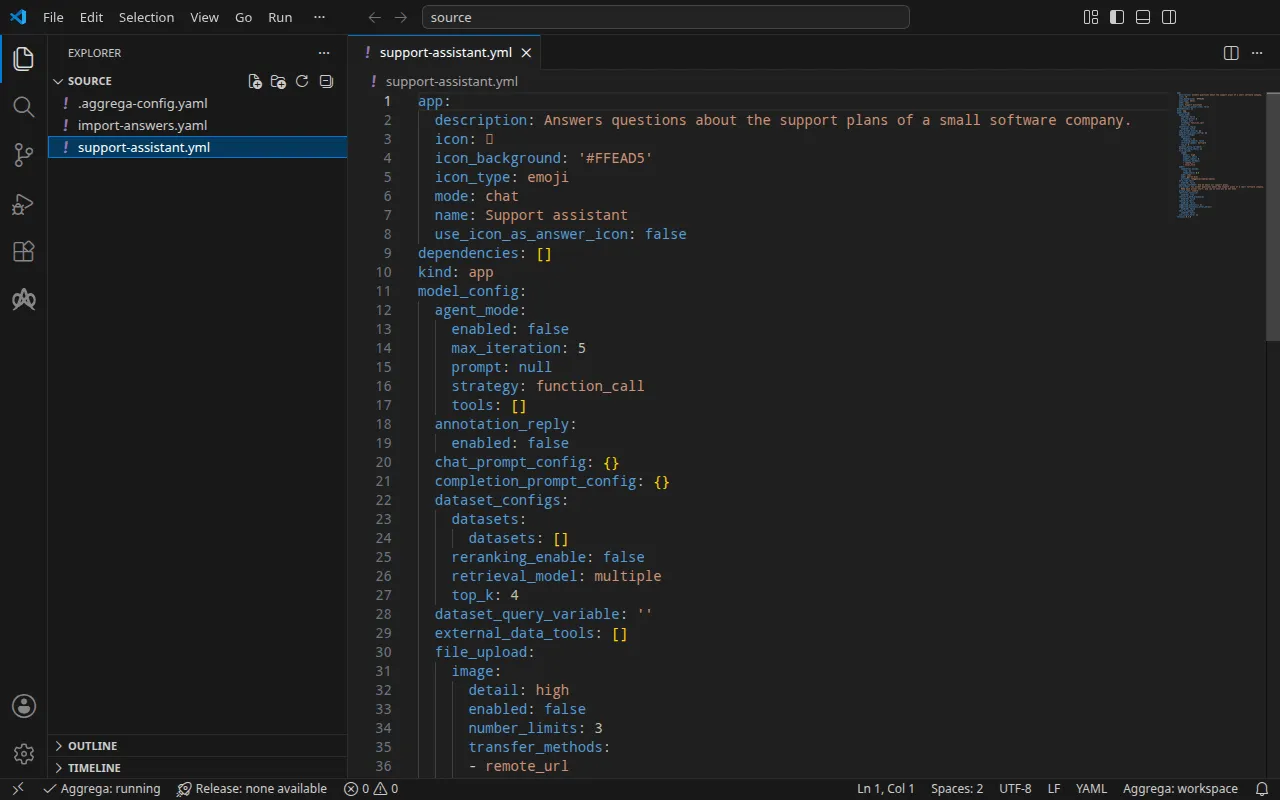
애플리케이션
이 안내를 위해 작성된 support-assistant.yml은 Dify가 애플리케이션용으로 내보내는 YAML인 Dify DSL로 작성된 채팅 애플리케이션이며, DSL 버전은 0.7.0입니다. 여는 문구, 짧은 프롬프트, 그리고 응답에 사용하는 모델이 공급자 이름으로 지정되어 있습니다:
model: completion_params: stop: [] temperature: 0.4 mode: chat name: gpt-4o-mini provider: langgenius/openai/openai그 옆에 있는 .aggrega-config.yaml이 폴더를 작업 공간으로 만듭니다:
# The workspace key marks this directory as the workspace root, so an import run# here writes its drafts beside support-assistant.yml.workspace: {}# The registry the importer is fetched from the first time an import needs it.default_registry: hub.aggrega.ai그리고 import-answers.yaml에는 어떤 애플리케이션도 담을 수 없는 것에 대한 답변이 들어 있습니다. 설치의 애플리케이션 시크릿, 즉 Dify가 세션에 서명하고 저장하는 모델 공급자 키를 암호화하는 데 쓰는 키와, 애플리케이션을 가져올 소유자 계정의 이메일과 비밀번호입니다. Kubernetes에서는 각 시크릿을 Kubernetes Secret에서 읽으므로, 그 답변은 해당 Secret의 이름입니다. Docker Compose에서에 나온 대로, 같은 파일을 Docker Compose용 가져오기에도 사용할 수 있습니다:
# Values the import could not draft from the source, keyed by the drafted file and the key path inside# it. Write each one beside its key; an import of the same source, and a sync, read them from here and# ask nothing. A secret is never written here: its key asks where the secret comes from — a variable# name, ${NAME}, or the name of a Kubernetes Secret.release.yaml: # Passed down to core/dify's secret_key parameter, which has no default; that parameter's description # in core/dify says what the value is. spec.parameters.secret_key: "dify-credentials" # Email address of the installation's owner account, read only when values.app_definition is set. The # step that imports the application creates this account when it performs Dify's first-time setup, and # signs in as it; on an installation whose setup has already run, it names an existing account allowed # to import applications, and the password attached to the owner_password slot is that account's. # Required when values.app_definition is set: the build halts when it is empty. It has no default. spec.boundaries.platform.aggregates.dify.components.api.infra.owner_email: "owner@example.com" # The origin of the secret value, written by the operator in the Release. Read exactly as # values.origin is. Write it here or in values.origin, never in both. A secret: name where it comes # from, never the value. spec.boundaries.platform.aggregates.dify.components.api.features.owner_password.infra.origin: "dify-owner"owner@example.com은 자신의 이메일을 나타냅니다. dify-credentials와 dify-owner는 실행하기에서 만드는 Secret입니다. 이 파일이 없으면 터미널에서의 가져오기는 세 값을 한 번에 한 질문씩 각각 묻고, 답변을 새 답변 파일에 씁니다. 아무것도 물을 수 없는 경우에는 세 키와 빈 답변으로 그 파일을 쓰고, 그것들을 나열한 뒤 상태 1로 종료합니다. 가져오기 답변 파일에서 이 파일을 자세히 설명합니다.
작업 공간이 카탈로그 폴더를 지정하지 않으므로, 가져오기는 임포터를 받아 오는 레지스트리에서 표준 라이브러리 카탈로그를 읽습니다. 이는 게시된 카탈로그의 서명된 스냅샷으로, 첫 번째 가져오기가 받아 와서 검증한 뒤 작업 공간의 콘텐츠 캐시에 보관하며, 가져오기가 초안 옆에 작성하는 기록에 그 다이제스트로 지정됩니다. AGGREGA_CATALOG_DIRS에서 또는 workspace.catalog_dirs 아래에서 자체 카탈로그 폴더를 지정하는 작업 공간은 대신 그 폴더들을 기준으로 가져옵니다. source로 이동합니다:
cd source가져오기 실행
표준 라이브러리의 Dify 설치는 Kubernetes와 Docker Compose에서 실현됩니다. 이 안내는 helm 대상을 지정합니다:
aggrega import support-assistant.yml --target helm표준 출력에는 작성한 것을 나열합니다:
wrote aggregate.yamlwrote release.yamlwrote manifest.yamlwrote .aggrega-import.json표준 오류에는 다음과 같이 출력합니다. 여기서 <workspace>는 명령을 실행한 폴더를 나타냅니다:
[… omitted: a warning that the importer runs unverified, printed where its module is read from beside its Plugin entity in a catalog folder rather than fetched]read as the dify format, with drafted paths relative to <workspace>warn: node model_config.model (model) names the model "gpt-4o-mini" of the model provider "langgenius/openai/openai", whose credentials are set inside Dify, and core/ai-agent/dify configures that for itself rather than reaching it through a socket, so the draft wires no part for itmade no choice for model_config.model (model)Pull complete: <workspace>/release.lock (entities=25, source_artifacts=0, external_inputs=0)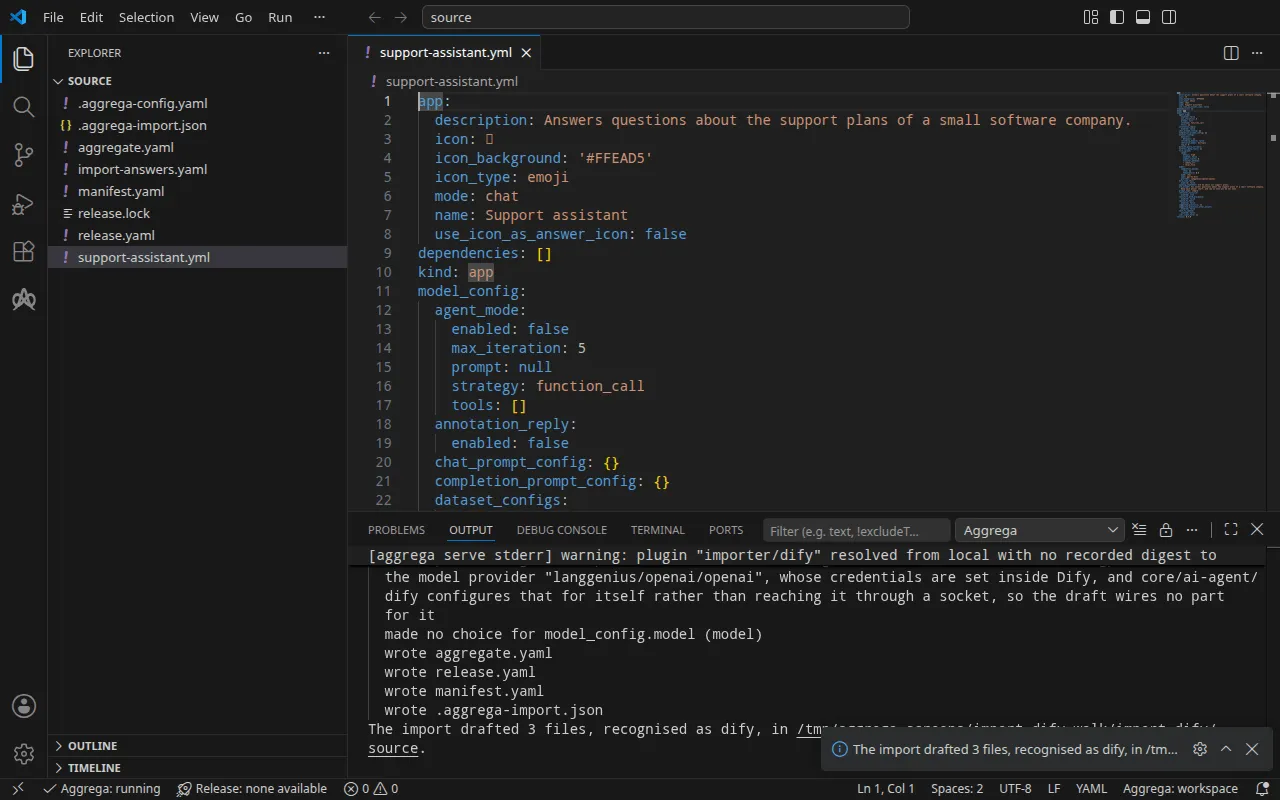
warn줄은 모델이 Dify 내부에 머문다는 것을 알려 줍니다. Dify는 모델 공급자와 그 키를 스스로 구성하므로 초안은 어떤 모델도 연결하지 않습니다. Dify가 실행되면 테스트하기에 나온 대로 Dify의 OpenAI 공급자를 설치하고 공급자의 키를 설정합니다.Pull complete줄은 풀입니다. 모든 값이 답변 파일에서 답변되었으므로, 가져오기는aggrega pull과 같이 초안으로 작성된 Release의 의존성을 풀하고release.lock을 썼습니다. 아래 빌드에는 더 이상 필요한 것이 없습니다.
작성하는 내용
Aggregate, Release, Manifest의 이름은 imported/support-assistant입니다. 애플리케이션의 이름, 즉 app 아래의 Support assistant를 support-assistant로 줄인 것이며, 이름이 없는 애플리케이션은 파일 이름을 따릅니다. 네임스페이스는 임포터의 target_namespace 설정이 정하며, 다른 값을 설정하지 않으면 imported입니다(설정).
aggregate.yaml — 표준 라이브러리의 Dify 설치인 core/dify로, 초안이 aggregates 아래에 구성하는 Aggregate이며, 애플리케이션은 그 app_definition 매개변수에 작성된 그대로 담겨 있고(여기서는 대부분을 생략했습니다), 설치의 secret_key는 초안이 선언하는 매개변수에서 전달됩니다:
apiVersion: aggrega.ai/v1beta1kind: Aggregatemetadata: name: imported/support-assistant version: 0.1.0 description: Draft Aggregate imported from a source in the dify format.spec: parameters: secret_key: type: string required: true minLength: 1 description: "Passed down to core/dify's secret_key parameter, which has no default; that parameter's description in core/dify says what the value is." aggregates: # An import sees the Components of the workspace's catalog and none of its Aggregates, so it does not check that the catalog holds core/dify. dify: type: core/dify parameters: secret_key: "{{ .parameters.secret_key }}" app_definition: | app: description: Answers questions about the support plans of a small software company. [… omitted: the rest of the application, as exported] version: 0.7.0이 설치는 서로 연결된 열 개의 컴포넌트(Dify의 API 서버, 워커, 스케줄러, 웹 프런트엔드, 코드 샌드박스, 플러그인 런타임, 이그레스 프록시, PostgreSQL, Redis 호환 캐시, Weaviate)로 이루어지며, 애플리케이션 가져오기는 API 서버의 Recipe가 렌더링하는 한 단계입니다. 애플리케이션 시크릿은 core/dify에 기본값이 없으므로, 초안은 secret_key를 기본값 없는 자체 매개변수로 선언하고 Release가 채우도록 아래로 전달합니다. 설치의 다른 자격 증명은 실행하기에서 설명하듯 core/dify가 부여하는 기본값을 유지합니다.
release.yaml — Release입니다. 설치를 경계 platform으로 라우팅하고, 애플리케이션이 제공할 수 없는 것을 응답 파일에서 채웁니다:
apiVersion: aggrega.ai/v1beta1kind: Releasemetadata: name: imported/support-assistant # environment is a drafted default, since no source names the environment this Release deploys to; change it to name the one it deploys to. environment: development version: 0.1.0 description: Draft Release imported from a source in the dify format.spec: aggregate: imported/support-assistant manifest: imported/support-assistant parameters: # Left for the Release, since the source cannot supply it: secret_key, which the drafted Aggregate declares and passes down to core/dify; that parameter's description there says what the value is secret_key: "dify-credentials" boundaries: platform: aggregates: dify: components: api: infra: # Lets the installation reach Dify's plugin marketplace, which the plugin serving the application's model, such as OpenAI's, is installed from. marketplace_enabled: true # Left for the Release, since the source cannot supply it: components.api.infra.owner_email, the email of the installation's owner account the application is imported under, on the api component of core/dify owner_email: "owner@example.com" features: owner_password: type: core/referenced-secret infra: # Left for the Release, since the source cannot supply it: the name of a Kubernetes Secret already in the namespace holding, under the data key value, the owner account's password. origin: "dify-owner" worker: infra: # Lets the installation reach Dify's plugin marketplace, which the plugin serving the application's model, such as OpenAI's, is installed from. marketplace_enabled: true scheduler: infra: # Lets the installation reach Dify's plugin marketplace, which the plugin serving the application's model, such as OpenAI's, is installed from. marketplace_enabled: trueenvironment값은development입니다. 이는 기본값이며, 그 위의 주석은 Release가 배포되는 환경으로 바꾸라고 안내합니다.secret_key값은 애플리케이션 시크릿을 보관하는 Secret의 이름dify-credentials이며, 설치가 지정하는 데이터 키secret-key아래에 있습니다. Manifest는 모든 자격 증명을 네임스페이스에 이미 있는 Secret에서 읽습니다.- 소유자 계정은 설치를 경계에 배치하는 라우팅 항목에서 설치의
api컴포넌트에 설정됩니다. 그 이메일과,core/referenced-secret으로 첨부된 비밀번호이며, 후자는 비밀번호를 데이터 키value아래에 보관하는 Secretdify-owner를 지정합니다. 응답된 값 위의 주석은 가져오기가 그 값을 초안으로 작성할 수 없었던 이유를 설명합니다. - **
marketplace_enabled**는 모든 대상에서 API 서버api, 그 워커, 그 스케줄러에 대해true입니다. Release가 허용하지 않는 한 설치는 Dify 공급업체의 어떤 것에도 도달하지 않으며, 애플리케이션이 응답에 사용하는 OpenAI 제공자는 테스트하기에서 보여 주듯이 Dify가 플러그인 마켓플레이스에서 설치하는 플러그인입니다. 세 구성 요소는 각각 자체 설정을 읽습니다.
manifest.yaml — 설치가 구성하는 각 컴포넌트에 대한 Helm Recipe와, 네임스페이스에 이미 있는 Secret에서 자격 증명을 읽는 실현입니다:
apiVersion: aggrega.ai/v1beta1kind: Manifestmetadata: name: imported/support-assistant version: 0.1.0spec: mappings: components: type: core/datastore/postgres: helm/postgres core/datastore/redis: helm/redis core/datastore/weaviate: helm/weaviate core/ai-agent/dify-ssrf-proxy: helm/dify-ssrf-proxy core/ai-agent/dify-sandbox: helm/dify-sandbox core/ai-agent/dify-plugin-daemon: helm/dify-plugin-daemon core/ai-agent/dify: helm/dify core/ai-agent/dify-worker: helm/dify-worker core/ai-agent/dify-worker-beat: helm/dify-worker-beat core/ai-agent/dify-web: helm/dify-web features: type: core/referenced-secret: helm/k8s-existing-secret--target은 초안 자체의 컴포넌트 유형뿐 아니라 초안이 구성하는 설치의 컴포넌트 유형도 매핑합니다. PostgreSQL처럼 카탈로그가 한 유형에 여러 Helm Recipes를 제공하는 경우, 유형 이름을 딴 것인 helm/postgres를 매핑합니다.
.aggrega-import.json은 가져오기가 작성한 내용의 기록으로, 이후의 aggrega import --sync가 이를 읽습니다. release.lock은 Release가 해석되는 모든 카탈로그 엔터티를 버전과 다이제스트로 고정합니다.
검증 및 빌드
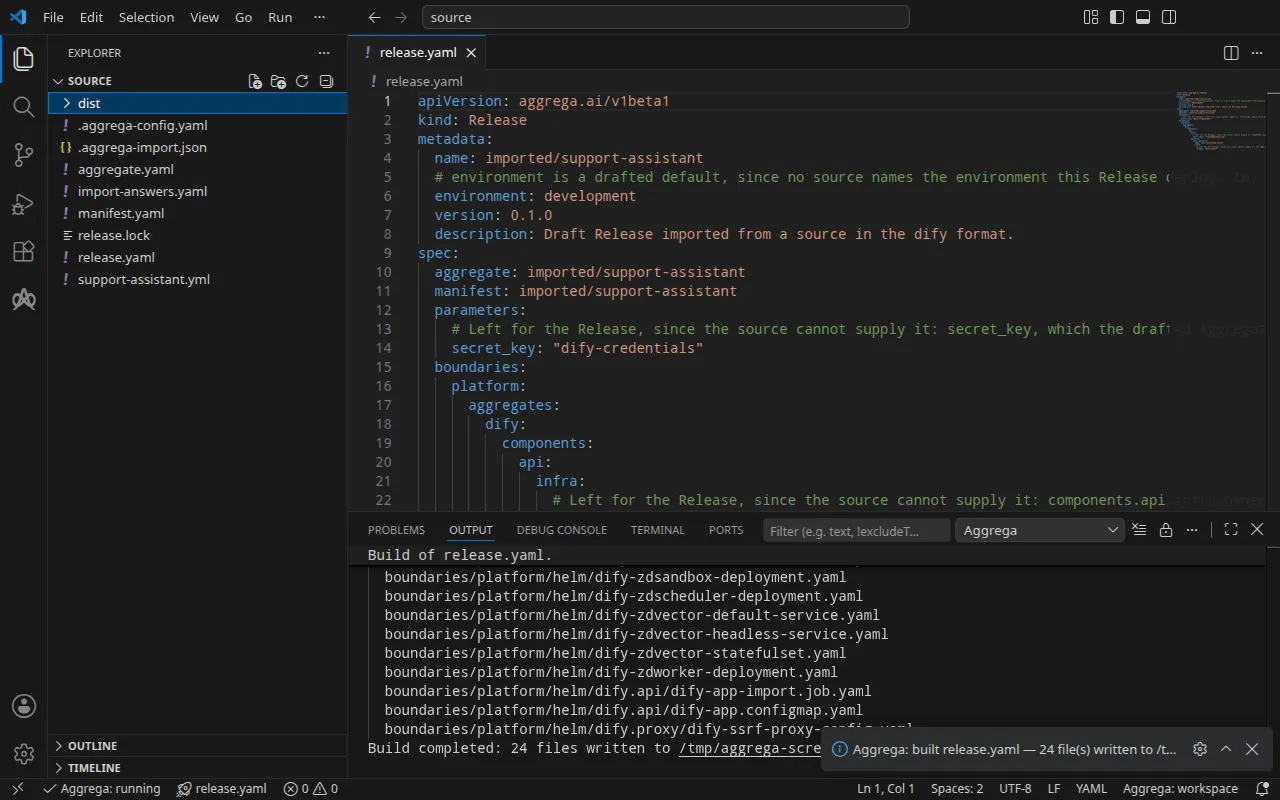
aggrega validate --release release.yamlaggrega build --release release.yaml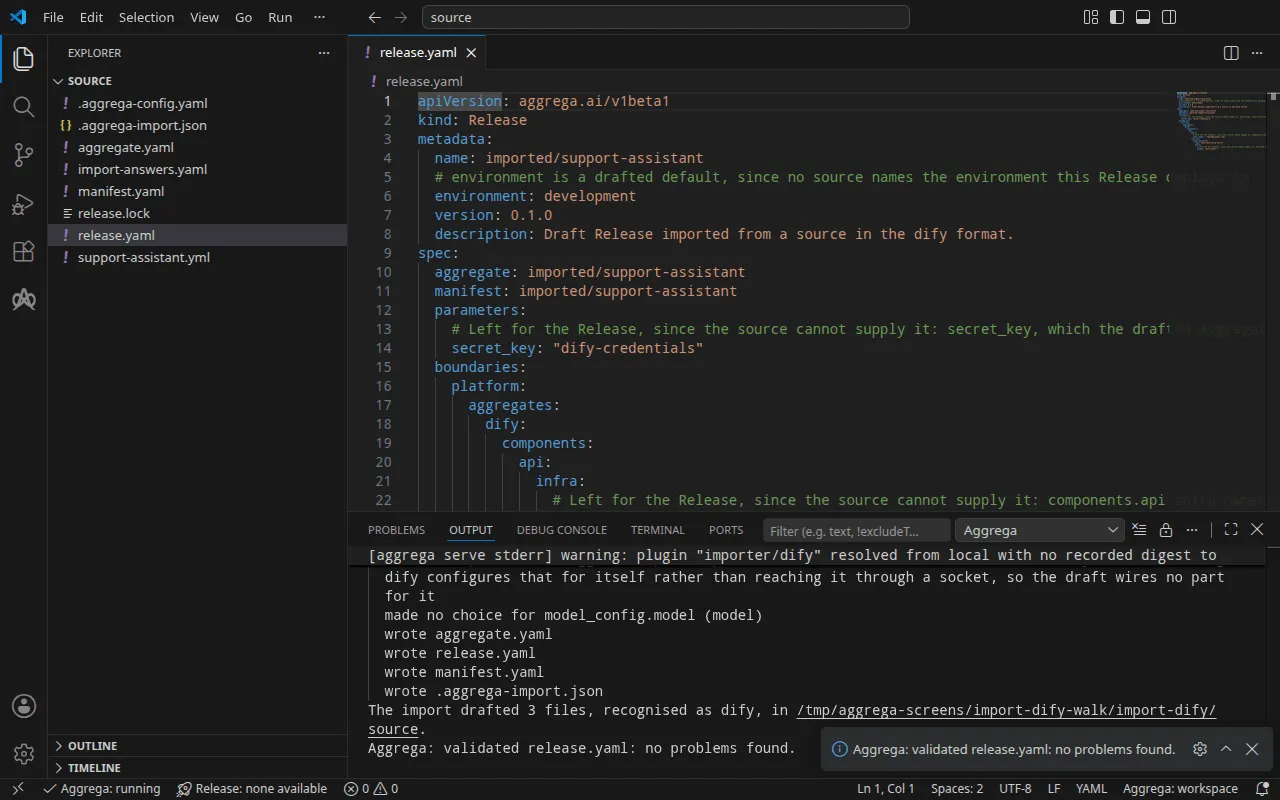
검증 결과는 다음과 같습니다:
notice: LINT: Feature "core/referenced-secret" at core/referenced-secret:1.0.0 declares property "origin" in both values: and infra: pillars (path: origin)release dependency validation passed: release.yaml (schema-pillar + dependency pillars)그리고 빌드 결과입니다. 여기서 <workspace>는 초안이 있는 폴더를 나타냅니다:
notice: LINT: Feature "core/referenced-secret" at core/referenced-secret:1.0.0 declares property "origin" in both values: and infra: pillars (path: origin)[… omitted: a total build time, which differs per run]Build completed: 24 files written to <workspace>/distnotice 줄은 권고 사항입니다. 시크릿 Feature는 origin을 Aggregate의 values 또는 Release의 infra에서 받으며, 이 알림은 한 리프가 양쪽에 모두 선언되어 있음을 보고합니다. 어떤 판정도 바꾸지 않습니다.
빌드는 설치의 Kubernetes 매니페스트를 dist/boundaries/platform/helm/ 아래에 씁니다. 그중에는 애플리케이션을 가져오는 Job인 dify.api/dify-app-import.job.yaml이 있습니다. 이 Job은 Dify의 API 서버가 응답할 때까지 기다리고, 최초 설정이 실행되지 않은 경우 Release가 지정한 소유자 계정으로 Dify의 최초 설정을 수행한 뒤, 애플리케이션을 가져옵니다:
spec: podFailurePolicy: rules: - action: FailJob onExitCodes: containerName: import operator: In values: [2] template: spec: restartPolicy: Never containers: - name: import image: "langgenius/dify-api:1.17.0" command: ["python", "/seed/import.py"] env: - name: DIFY_API_URL value: "http://dify-zdapi-default:5001" - name: OWNER_EMAIL value: "owner@example.com" - name: OWNER_PASSWORD valueFrom: secretKeyRef: name: "dify-owner" key: "value" volumeMounts: - name: seed mountPath: /seed readOnly: true volumes: - name: seed configMap: name: dify-zdapi-app애플리케이션 자체는 그 옆의 ConfigMap에 있습니다. Dify가 단계가 보낸 내용을 요청 시간 초과나 속도 제한이 아닌 클라이언트 오류 응답으로 거부하거나 가져오기가 실패했다고 보고하면, 단계는 Dify의 응답에 담긴 메시지를 출력하고 상태 2로 종료합니다. 정의가 app.name 아래에 애플리케이션을 지정하지 않을 때도 마찬가지입니다. 재시도해도 같은 방식으로 거부되므로 Job의 podFailurePolicy는 해당 시도에서 Job을 실패 처리합니다. 서버가 약 10분 안에 응답하지 않는 경우 등 그 밖의 모든 실패는 재시도됩니다.
AI 어시스턴트 사용
Aggrega의 도구로 설정된 AI 어시스턴트도 같은 일을 할 수 있습니다. 다음 프롬프트를 붙여 넣으십시오.
Aggrega 도구만 사용하고, 직접 폴더를 만들지 마세요. Workspace 폴더에 아직 `import-dify` 폴더가 없으면 `example`을 `import-dify`로 설정하고 `dir` 없이 `scaffold` 도구를 한 번 호출하세요. 그러면 예제가 새 `import-dify` 폴더에 작성되며, 그 안의 `source` 폴더에 이 페이지가 가져오는 내용이 들어 있습니다. 그런 다음 `workspace_root`를 `import-dify/source`로, `source`를 `support-assistant.yml`로, `target`을 `helm`으로 설정하여 `import` 도구를 호출하세요. 이 도구는 `support-assistant.yml` 옆의 `import-answers.yaml`에서 필요한 답변을 읽고, 초안을 `import-dify/source`에 작성하며, 초안에 필요한 것을 가져옵니다. 그런 다음 `workspace_root`를 `import-dify/source`로, `release`를 `release.yaml`로 설정하여 `validate` 도구를 호출하고, `workspace_root`를 `import-dify/source`로, `release`를 `release.yaml`로, `write`를 true로 설정하여 `build` 도구를 호출하세요. 빌드가 작성한 파일을 알려 주세요. 파일은 `import-dify/source/dist/` 아래에 있습니다.VS Code에서 열기
Visual Studio Code용 Aggrega 확장을 설치한 상태에서, 가져오기가 초안을 작성한 폴더 import-dify/source를 VS Code에서 엽니다. 이 폴더에는 Release가 하나, 즉 초안 release.yaml만 있으므로 편집기가 이를 자동으로 선택합니다. Docker Compose에서가 두 번째 Release를 compose에 작성한 뒤에는 **Aggrega: Select Release…**로 편집기가 작업할 것을 선택합니다. 편집기는 초안을 편집하는 동안 선택된 Release에 대해 검사하여 발견한 내용을 파일과 문제 패널에 표시합니다. 명령 팔레트의 Aggrega: Show topology graph는 선택된 Release의 구성 요소와 그 사이의 연결을 그립니다. Aggrega: Build, Aggrega: Preview build, Aggrega: Pull은 같은 Release에 대해 작동하며, 각각은 작업 표시줄에 있는 Aggrega 뷰의 Commands 패널 버튼이기도 합니다. Build는 파일을 폴더의 dist/에 작성합니다. 나머지는 Visual Studio Code에서 Aggrega 사용하기에서 다룹니다.
실행하기
매니페스트를 적용하기 전에 매니페스트가 읽는 Secret을 만듭니다. 존재하지 않는 Secret을 지정하는 워크로드는 시작되지 않습니다. 그중 둘은 답변 파일이 지정한 내용을 보관합니다. 소유자의 비밀번호를 value 아래에 보관하는 dify-owner와, 애플리케이션 시크릿을 secret-key 아래에 보관하는 dify-credentials입니다. 설치의 나머지 네 가지 자격 증명(데이터베이스 비밀번호, 그리고 구성 요소들이 서로에게 제시하는 세 가지 키)은 core/dify가 부여하는 기본값을 유지하며, Kubernetes에서는 각 기본값이 매니페스트가 그 값을 읽어 오는 Secret의 이름입니다. db-password 아래의 dify-db-password-for-evaluation-only, code-execution-key 아래의 dify-code-execution-key-for-evaluation-only, plugin-daemon-key 아래의 dify-plugin-daemon-key-for-evaluation-only, inner-api-key 아래의 dify-inner-api-key-for-evaluation-only입니다. 이 네 가지도 각각 직접 정한 값을 담아 만듭니다. 다른 이름의 Secret에서 읽으려면 Aggregate의 dify 항목에서 parameters 아래에 db_password, code_execution_key, plugin_daemon_key, inner_api_key로 이름을 core/dify에 전달합니다.
아래에서 소유자의 비밀번호로 로그인하므로, 셸에서 이를 DIFY_OWNER_PASSWORD로 설정합니다. Dify는 문자와 숫자를 하나씩 포함한 8자 이상의 소유자 비밀번호를 받습니다. 다른 비밀번호를 주면 Dify가 초기 설정을 거부하는 즉시 가져오기 Job이 실패하고, 그 로그에 first-time setup was refused with HTTP 422: Validation error for parameter 'payload'가 표시됩니다. 이는 Dify가 거부하는 소유자 계정에 돌려주는 응답입니다. 아래의 대기는 Job이 완료되기를 기다리는데, 실패한 Job은 결코 완료되지 않으므로 이때 대기는 시간 제한에 도달할 때까지 계속됩니다. 그 옆의 두 번째 터미널에서 kubectl wait --for=condition=failed job/dify-zdapi-app-import --timeout=15m를 실행하면, 그 대기는 Job이 실패하는 즉시 반환됩니다. Job과 dify-owner Secret을 삭제하고, Dify가 받는 비밀번호로 Secret을 다시 만든 뒤 다시 적용합니다.
나머지 다섯 Secret마다 한 줄을 담은 파일을 하나씩 작성합니다. 그 줄은 데이터 키, =, 직접 정한 값으로 이루어집니다. dify-credentials.env에는 secret-key=, db-password.env에는 db-password=, code-execution-key.env에는 code-execution-key=, plugin-daemon-key.env에는 plugin-daemon-key=, inner-api-key.env에는 inner-api-key=입니다. 그런 다음 여섯 Secret을 만듭니다. 이제 클러스터가 값을 보관하므로 파일을 삭제합니다:
printf 'value=%s\n' "$DIFY_OWNER_PASSWORD" > dify-owner.envkubectl create secret generic dify-owner --from-env-file=dify-owner.envkubectl create secret generic dify-credentials --from-env-file=dify-credentials.envkubectl create secret generic dify-db-password-for-evaluation-only --from-env-file=db-password.envkubectl create secret generic dify-code-execution-key-for-evaluation-only --from-env-file=code-execution-key.envkubectl create secret generic dify-plugin-daemon-key-for-evaluation-only --from-env-file=plugin-daemon-key.envkubectl create secret generic dify-inner-api-key-for-evaluation-only --from-env-file=inner-api-key.envrm dify-owner.env dify-credentials.env db-password.env code-execution-key.env plugin-daemon-key.env inner-api-key.env가져오기 실행 방식의 실행 단계에서 설명한 대로 매니페스트를 적용하고 — -R은 dify.api/와 dify.proxy/에 있는 Job과 두 ConfigMap까지 닿습니다 — 그런 다음 가져오기 Job을 기다려 로그를 읽고, 플러그인 런타임을 기다립니다:
kubectl apply -R -f dist/boundaries/platform/helm/kubectl wait --for=condition=complete job/dify-zdapi-app-import --timeout=15mkubectl logs job/dify-zdapi-app-importkubectl rollout status statefulset/dify-zdpluginsservice/dify-zdapi-default createddeployment.apps/dify-zdapi created[… omitted: a line for each of the other Services, Deployments and StatefulSets]job.batch/dify-zdapi-app-import createdconfigmap/dify-zdapi-app createdconfigmap/dify-zdproxy-config createdjob.batch/dify-zdapi-app-import condition metfirst-time setup done: owner account owner@example.comimported 'Support assistant' as application 7e03e85c-b13f-4ddc-b539-040470a61d4cpartitioned roll out complete: 1 new pods have been updated...로그에는 테스트하기에 필요한 애플리케이션 식별자가 나옵니다.
테스트하기
Dify의 API는 http://127.0.0.1:5001에서 응답합니다. Kubernetes에서는 적용한 네임스페이스에 있는 API 서버의 Service dify-zdapi-default로 로컬 포트를 포워딩하고, 두 번째 터미널에서 그 명령을 실행 중인 상태로 둡니다:
kubectl port-forward -n <namespace> svc/dify-zdapi-default 5001:5001Docker Compose에서에 나온 대로 시작한 Docker Compose에서는 Release가 이미 그 주소에서 API를, http://127.0.0.1:3001에서 콘솔을 게시합니다. 콘솔의 로그인 페이지인 http://127.0.0.1:3001/signin을 엽니다. /는 그곳으로 리디렉션됩니다. 페이지는 http://127.0.0.1:5001의 API로 요청을 보내며, Dify의 API는 초안의 console_url이 지정하는 주소인 http://127.0.0.1:3001에서 제공된 페이지에 대해서만 브라우저에 응답하므로, 그곳에서 소유자로 로그인합니다. 다른 주소에서 열면 콘솔의 요청은 그러한 응답을 받지 못하고 브라우저가 모든 응답을 거부합니다. 콘솔을 다른 포트에 게시하려면 console_url도 함께 변경하십시오.
애플리케이션은 브라우저 없이 API를 통해서도 응답합니다. DIFY_OWNER_PASSWORD가 설정된 터미널에서 소유자로 로그인합니다. 콘솔 API는 비밀번호를 Base64로 인코딩하여 받으며, 로그인하면 세션이 cookies.txt에 남습니다. 이후의 모든 콘솔 요청은 같은 파일의 CSRF 토큰을 X-CSRF-Token 헤더에 담아 세션을 다시 보냅니다. 토큰이 없는 요청은 CSRF token is missing or invalid.로 거부됩니다.
printf '{"email": "owner@example.com", "password": "%s"}' "$(printf %s "$DIFY_OWNER_PASSWORD" | base64 | tr -d '\n')" | curl -sS -c cookies.txt http://127.0.0.1:5001/console/api/login -H 'Content-Type: application/json' -d @-CSRF=$(awk '$6 == "csrf_token" {print $7}' cookies.txt){"result":"success"}Dify의 모델 공급자는 플러그인이며, 새로 설치한 환경에는 하나도 없습니다. 이 실행에서 설치한 버전인 1.1.0의 Dify OpenAI 공급자를 설치합니다. 플러그인 런타임은 초안의 marketplace_enabled로 설치 환경이 접근할 수 있게 된 Dify 마켓플레이스에서 이를 가져오므로, 설치 환경은 인터넷에 접근할 수 있어야 합니다:
curl -sS -b cookies.txt -H "X-CSRF-Token: $CSRF" -H 'Content-Type: application/json' \ http://127.0.0.1:5001/console/api/workspaces/current/plugin/install/marketplace \ -d '{"plugin_unique_identifiers": ["langgenius/openai:1.1.0@1ded02acee56efd5788c86fd447d792e4923e959554a4942f440c7859d164340"]}'{"all_installed":false,"task_id":"01a1dc0a-653d-756b-a104-e5d6d1e43695","task":null}Release에서 marketplace_enabled를 삭제하면 Dify는 대신 {"code":"invalid_param","message":"marketplace is not enabled","status":400}로 요청을 거부합니다. 설치는 백그라운드에서 실행됩니다. 응답에 나온 task_id로, status가 success가 될 때까지 해당 작업을 조회합니다:
curl -sS -b cookies.txt -H "X-CSRF-Token: $CSRF" \ http://127.0.0.1:5001/console/api/workspaces/current/plugin/tasks/<task id>{"task":{"id":"01a1dc0a-653d-756b-a104-e5d6d1e43695",[… omitted: when it was created and last updated],"status":"success","total_plugins":1,"completed_plugins":1,"plugins":[{"plugin_unique_identifier":"langgenius\/openai:1.1.0@1ded02acee56efd5788c86fd447d792e4923e959554a4942f440c7859d164340",[… omitted: the plugin's status, its icon and its names in four languages]}]}}공급자의 키를 openai.json에 {"credentials": {"openai_api_key": "your OpenAI key"}} 형태로 쓰고, 설정한 다음 파일을 삭제합니다:
curl -sS -b cookies.txt -H "X-CSRF-Token: $CSRF" -H 'Content-Type: application/json' \ http://127.0.0.1:5001/console/api/workspaces/current/model-providers/langgenius/openai/openai/credentials \ -d @openai.jsonrm openai.jsonDify는 키를 저장하기 전에 공급자에 한 번 요청하여 키를 확인하고, 공급자가 받아들이는 키에는 {"result":"success"}로 응답합니다. 이 실행은 자리 표시자 값을 설정했고, Dify는 OpenAI의 응답과 함께 이를 거부했습니다:
{"code":"invalid_param","message":"Error code: 401 - {'error': {'message': 'Incorrect API key provided: sk-place*****************-key. You can find your API key at https:\/\/platform.openai.com\/account\/api-keys.', 'type': 'invalid_request_error', 'code': 'invalid_api_key', 'param': None}, 'status': 401}","status":400}애플리케이션은 자체 API 키로 이루어진 요청에 응답합니다. 애플리케이션을 가져오는 단계의 로그에 나온 애플리케이션 식별자로 키를 하나 만듭니다. Docker Compose에서는 docker compose -p support-assistant -f ../dist/boundaries/platform/compose/docker-compose.yaml logs dify-zdapi-app-import로 확인합니다:
curl -sS -X POST -b cookies.txt -H "X-CSRF-Token: $CSRF" \ http://127.0.0.1:5001/console/api/apps/<application id>/api-keys{"id":"8d6c1eb1-cf61-4825-9b04-f32689ed0489","type":"app","token":"[… omitted: the key]","last_used_at":null,"created_at":1794693042}그리고 키, 즉 응답의 token으로 애플리케이션에 메시지를 보냅니다:
curl -sS http://127.0.0.1:5001/v1/chat-messages \ -H 'Authorization: Bearer <app key>' -H 'Content-Type: application/json' \ -d '{"inputs": {}, "query": "In one short sentence: what does a support plan cover?", "response_mode": "blocking", "user": "test-it"}'자리 표시자 값이 거부되었으므로 모델에는 키가 없고, Dify는 그렇게 알려 줍니다:
{"code":"provider_not_initialize","message":"Model gpt-4o-mini credentials is not initialized.","status":400}Kubernetes와 Docker Compose에서의 실행은 같은 응답을 받았습니다. 공급자가 받아들이는 키가 있으면 응답의 answer에 모델의 답변이 담깁니다.
Kubernetes에서는 포트 포워딩을 중지한 다음, 적용한 것과 Secret들, 세션 파일을 제거합니다:
kubectl delete -R -f dist/boundaries/platform/helm/kubectl delete secret dify-owner dify-credentials dify-db-password-for-evaluation-only dify-code-execution-key-for-evaluation-only dify-plugin-daemon-key-for-evaluation-only dify-inner-api-key-for-evaluation-onlykubectl delete pvc data-dify-zddb-0 storage-dify-zdplugins-0 data-dify-zdvector-0rm cookies.txtKubernetes는 StatefulSet이 삭제될 때 그 StatefulSet이 만든 볼륨 클레임을 유지하므로, 세 번째 명령이 이를 제거하며 그와 함께 데이터베이스, 설치된 플러그인, 벡터 저장소도 제거됩니다. Docker Compose에서는 docker compose -p support-assistant -f ../dist/boundaries/platform/compose/docker-compose.yaml down -v가 스택과 그 볼륨을 제거합니다.
Docker Compose에서
같은 애플리케이션을 같은 답변 파일로 compose 대상을 사용해 Docker Compose용으로 가져올 수 있습니다. Kubernetes용 초안은 이미 source에 있으므로, Compose용 초안은 --output-dir로 별도의 폴더에 작성합니다. 그래도 가져오기는 애플리케이션 옆의 답변 파일을 읽습니다:
aggrega import support-assistant.yml --target compose --output-dir composeDocker Compose에는 지정할 Secret이 없으므로, compose에서는 초안이 애플리케이션 시크릿과 소유자 비밀번호를 직접 작성합니다. 각각은 스택을 시작하는 사람의 환경에서 Docker Compose가 채우는 변수 참조로 작성됩니다. 그곳에서 필요한 것은 소유자의 이메일뿐입니다. 가져오기는 두 Secret 이름을 적용하지 않고 답변 파일에 남겨 두며, 표준 오류에 그 사실을 알립니다:
info: the answers file <workspace>/import-answers.yaml also answers spec.boundaries.platform.aggregates.dify.components.api.features.owner_password.infra.origin in release.yaml, spec.parameters.secret_key in release.yaml, which these drafts do not leave empty; those answers are kept there and not applied초안 Release는 애플리케이션 시크릿을 DIFY_SECRET_KEY에서, 소유자 비밀번호를 DIFY_OWNER_PASSWORD에서 읽고, 루프백 주소의 포트 5001에 API를, 3001에 프런트엔드 console을 게시합니다:
parameters: # Passed by reference, never as a value: secret_key, which the drafted Aggregate declares and passes down to core/dify; that parameter's description there says what the value is; it is read from the variable DIFY_SECRET_KEY, which a target substituting variable references, as Docker Compose does when the stack starts, reads from the environment, so no file carries the value. secret_key: "${DIFY_SECRET_KEY}" [… omitted: the boundary, the marketplace switch, and the owner's email, answered as above] # Published on this machine's loopback address, 127.0.0.1: reachable from this machine only, by any process running on it. Delete this line to keep the service internal. published_port: 5001 console_url: "http://127.0.0.1:3001" features: owner_password: type: core/referenced-secret infra: # Attached by reference, never as a value: the owner account's password, read from the variable DIFY_OWNER_PASSWORD, which a target substituting variable references, as Docker Compose does when the stack starts, reads from the environment, so no file carries the value. origin: "${DIFY_OWNER_PASSWORD}" [… omitted: the worker and the scheduler, each with the marketplace switch, as above] console: infra: # Published on this machine's loopback address, 127.0.0.1: reachable from this machine only, by any process running on it. Delete this line to keep the service internal. published_port: 3001주석에 적힌 대로 각 포트는 내 컴퓨터에서만 접근할 수 있으며, 줄을 삭제하면 해당 서비스는 스택의 네트워크에만 남습니다. 프런트엔드는 컨테이너 안에서 3000을 수신 대기하고 3001에 게시되므로, 3000을 게시하는 다른 예제와 나란히 실행할 수 있습니다. API 서버의 console_url은 프런트엔드가 게시되는 주소이므로, 프런트엔드에 대해 변경하는 포트는 그곳에서도 변경됩니다.
Manifest는 각 구성 요소를 해당 Compose Recipe에, core/referenced-secret을 compose/dotenv-referenced-secret에 매핑하며, 후자는 각 참조를 있는 그대로 Compose 파일에 작성합니다. 새 폴더에서 검증하고 빌드합니다:
cd composeaggrega validate --release release.yamlaggrega build --release release.yaml빌드는 워크스페이스 루트의 dist 아래에 작성하며, 워크스페이스는 여전히 .aggrega-config.yaml이 있는 폴더인 source입니다. Compose 파일은 source/dist/boundaries/platform/compose/docker-compose.yaml이며, compose에서 보면 ../dist/boundaries/platform/compose/docker-compose.yaml입니다. compose 안에는 dist 폴더가 작성되지 않습니다. 이 파일에는 두 값 대신 SECRET_KEY: ${DIFY_SECRET_KEY}와 OWNER_PASSWORD: ${DIFY_OWNER_PASSWORD}가 들어 있습니다. 스택을 시작하기 전에 두 변수를 셸에서, 또는 Compose 파일 옆의 .env 파일에서 설정합니다.
설치의 나머지 자격 증명 네 개는 core/dify가 주는 기본값을 유지하며, Docker Compose에서는 각 기본값이 값 그 자체로 Compose 파일에 그대로 작성됩니다. DB_PASSWORD: dify-db-password-for-evaluation-only이고 데이터베이스의 POSTGRES_PASSWORD도 같으며, 마찬가지로 dify-code-execution-key-for-evaluation-only, dify-plugin-daemon-key-for-evaluation-only, dify-inner-api-key-for-evaluation-only가 있습니다. 카탈로그를 읽는 누구나 이 기본값을 알고 있으므로 평가 용도로만 사용할 수 있습니다. 하나를 바꾸려면 초안 Aggregate에 그 값을 위한 문자열 매개변수를 선언하고, 초안이 secret_key를 전달하는 것처럼 dify 항목의 parameters에서 core/dify가 쓰는 이름 — db_password, code_execution_key, plugin_daemon_key 또는 inner_api_key — 으로 전달한 뒤, Release의 parameters에서 값을 채웁니다. db_password: "${DIFY_DB_PASSWORD}"를 작성한 Release는 DB_PASSWORD: ${DIFY_DB_PASSWORD}와 POSTGRES_PASSWORD: ${DIFY_DB_PASSWORD}를 담은 Compose 파일을 빌드하며, 이 값들은 위의 두 값처럼 환경에서 채워집니다.
실행하기에서 설명하는 대로 Dify가 받아들이는 소유자 비밀번호를 사용하여 compose에서 스택을 시작합니다:
export DIFY_SECRET_KEY='a long random value of your own'export DIFY_OWNER_PASSWORD='a password of your own'docker compose -p support-assistant -f ../dist/boundaries/platform/compose/docker-compose.yaml up -d --wait이 실행에서 --wait는 모든 서버가 정상으로 보고된 뒤 약 1분 만에 반환되었습니다. 애플리케이션을 가져오는 단계는 서버들과 나란히 실행되고, 가져오기를 마치면 종료합니다. 그러면 로그는 다음과 같습니다:
first-time setup done: owner account owner@example.comimported 'Support assistant' as application 7fae73f4-826b-4918-a623-a3383aa0da8c테스트하기는 게시된 두 포트로 설치에 접근합니다.