

导入 Dify 应用
本演练将一个从 Dify 导出的应用——一个基于 OpenAI 模型的聊天助手——导入为一个 Aggregate、一个 Release 和一个 Manifest,它们按原样即可为 Kubernetes 构建承载该应用的标准库 Dify 安装;随后构建它们并运行结果。下面的每个文件和每段输出都来自一次真实运行;该应用和演练的每个阶段都位于 import-dify 示例中,其中的检查脚本会再次运行导入,将它写入的内容、打印的内容以及本页引用的各段内容与保存在那里的文件进行比较,并验证和构建导入所写的内容。
生成示例
你可以使用本页的命令运行此导入,也可以让你的 AI 助手替你运行。
将示例写入一个以其命名的新文件夹:
aggrega scaffold --example import-dify然后它会打印接下来要运行的命令。第一条命令进入新文件夹;其后的那条命令见下文,它进入新文件夹的 source 文件夹,该文件夹包含本页导入的内容,也是运行导入的位置:
cd import-dify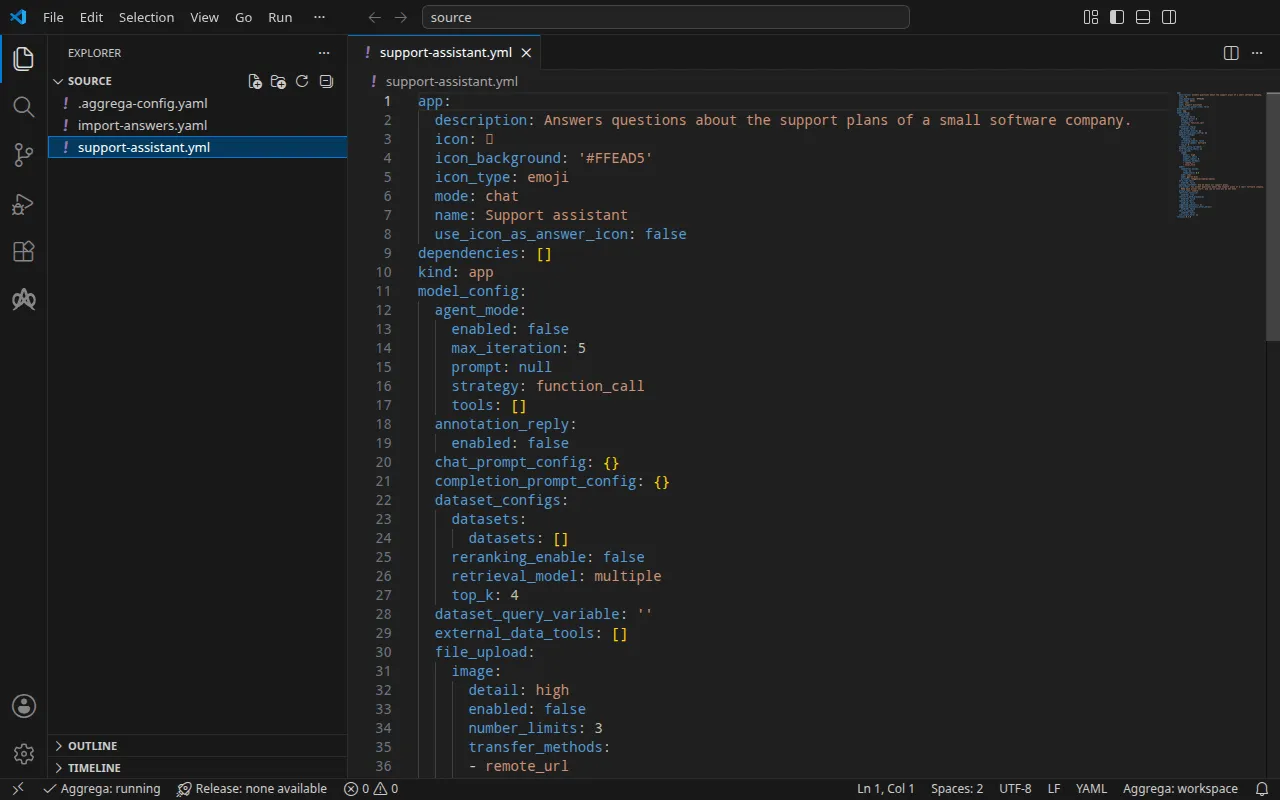
应用
support-assistant.yml 专为本演练编写,是一个用 Dify 的 DSL(Dify 为应用导出的 YAML)编写的聊天应用,DSL 版本为 0.7.0:包含一段开场白、一个简短的提示词,以及它用来回答的模型,该模型按其提供方指明:
model: completion_params: stop: [] temperature: 0.4 mode: chat name: gpt-4o-mini provider: langgenius/openai/openai在它旁边,一个 .aggrega-config.yaml 使该文件夹成为工作区:
# The workspace key marks this directory as the workspace root, so an import run# here writes its drafts beside support-assistant.yml.workspace: {}# The registry the importer is fetched from the first time an import needs it.default_registry: hub.aggrega.ai而 import-answers.yaml 保存了任何应用都无法保存的内容的答案:安装的应用密钥,即 Dify 用来签署会话、并用来加密其存储的模型提供方密钥的密钥;以及导入应用所属的所有者账户,包括其邮箱和密码。在 Kubernetes 上,每个机密都从一个 Kubernetes Secret 中读取,因此其答案就是该 Secret 的名称;同一个文件也可用于面向 Docker Compose 的导入,如 在 Docker Compose 上 所示:
# Values the import could not draft from the source, keyed by the drafted file and the key path inside# it. Write each one beside its key; an import of the same source, and a sync, read them from here and# ask nothing. A secret is never written here: its key asks where the secret comes from — a variable# name, ${NAME}, or the name of a Kubernetes Secret.release.yaml: # Passed down to core/dify's secret_key parameter, which has no default; that parameter's description # in core/dify says what the value is. spec.parameters.secret_key: "dify-credentials" # Email address of the installation's owner account, read only when values.app_definition is set. The # step that imports the application creates this account when it performs Dify's first-time setup, and # signs in as it; on an installation whose setup has already run, it names an existing account allowed # to import applications, and the password attached to the owner_password slot is that account's. # Required when values.app_definition is set: the build halts when it is empty. It has no default. spec.boundaries.platform.aggregates.dify.components.api.infra.owner_email: "owner@example.com" # The origin of the secret value, written by the operator in the Release. Read exactly as # values.origin is. Write it here or in values.origin, never in both. A secret: name where it comes # from, never the value. spec.boundaries.platform.aggregates.dify.components.api.features.owner_password.infra.origin: "dify-owner"owner@example.com 代表你自己的邮箱;dify-credentials 和 dify-owner 是 运行 中创建的 Secret。没有该文件时,在终端中进行的导入会逐一询问这三个值,每次一个问题,并将你的答案写入一个新的答案文件;在无法询问的地方,它会写入包含这三个键和空答案的该文件,列出它们,并以状态 1 退出。导入答案文件 完整描述了该文件。
工作区没有指定目录文件夹,因此导入会从获取其导入器的注册表中读取标准库目录:这是已发布目录的一个签名快照,由第一次导入获取、验证并保存在工作区的内容缓存中,并在导入写在其草稿旁的记录中以其摘要标明。指定了自己的目录文件夹的工作区——在 AGGREGA_CATALOG_DIRS 中,或在 workspace.catalog_dirs 下——则改为针对这些文件夹进行导入。进入 source:
cd source运行导入
标准库的 Dify 安装在 Kubernetes 和 Docker Compose 上实现。本演练指定 helm 目标:
aggrega import support-assistant.yml --target helm它在标准输出上列出所写的内容:
wrote aggregate.yamlwrote release.yamlwrote manifest.yamlwrote .aggrega-import.json在标准错误上,其中 <workspace> 代表你运行它的文件夹:
[… omitted: a warning that the importer runs unverified, printed where its module is read from beside its Plugin entity in a catalog folder rather than fetched]read as the dify format, with drafted paths relative to <workspace>warn: node model_config.model (model) names the model "gpt-4o-mini" of the model provider "langgenius/openai/openai", whose credentials are set inside Dify, and core/ai-agent/dify configures that for itself rather than reaching it through a socket, so the draft wires no part for itmade no choice for model_config.model (model)Pull complete: <workspace>/release.lock (entities=25, source_artifacts=0, external_inputs=0)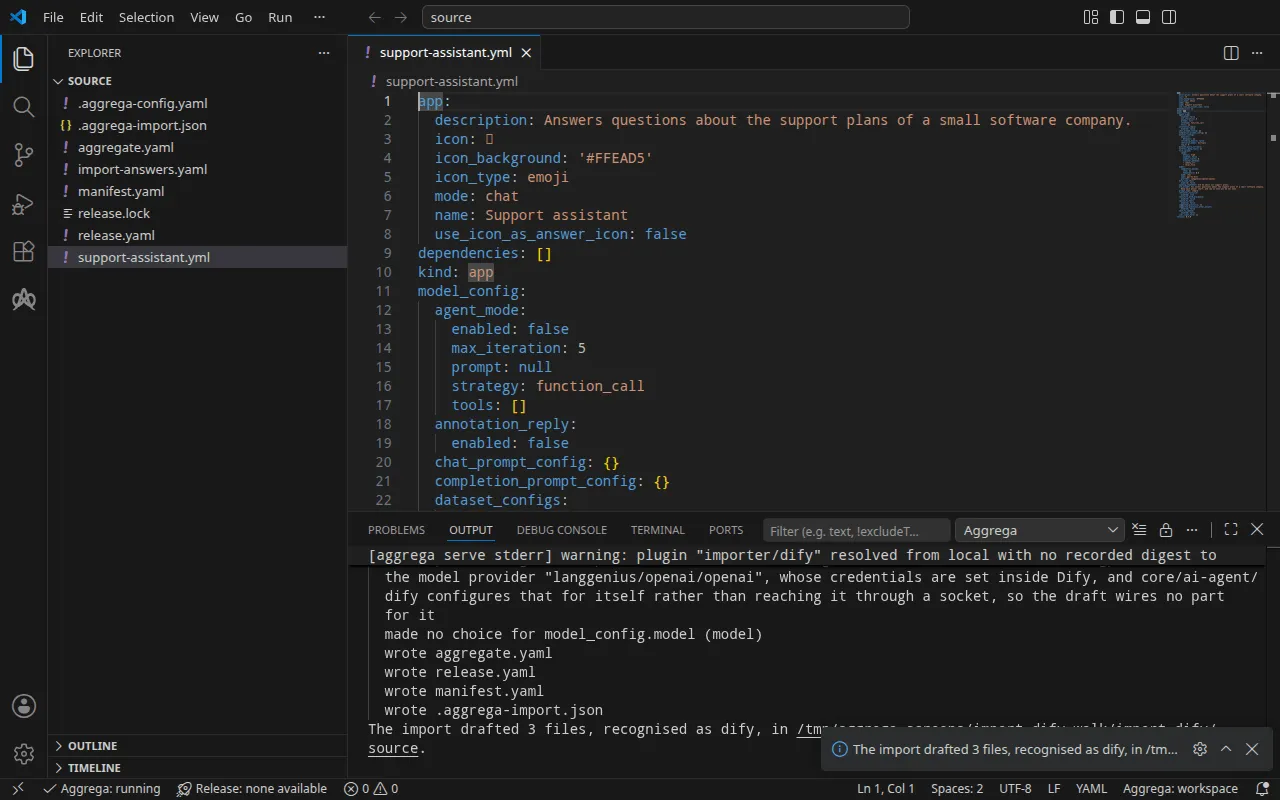
warn行说明模型保留在 Dify 内部:Dify 自行配置其模型提供方及其密钥,因此草稿不连接任何模型。Dify 运行后,你安装它的 OpenAI 提供方并设置该提供方的密钥,如 测试 所示。Pull complete行即拉取。由于每个值都已由答案文件给出,导入像aggrega pull一样拉取了草拟的 Release 的依赖项,并写入了release.lock;下面的构建无需其他任何东西。
它写出的内容
该 Aggregate、Release 和 Manifest 命名为 imported/support-assistant,取自应用的名称,即 app 下的 Support assistant,缩减为 support-assistant——没有名称的应用按其文件命名——位于导入器的 target_namespace 设置所设定的命名空间下,除非你另行设置,否则该命名空间为 imported(设置)。
aggregate.yaml——标准库的 Dify 安装 core/dify,这是草稿在 aggregates 下组合的一个 Aggregate,应用按原样承载在其 app_definition 参数中,此处省略了其中的大部分内容,安装的 secret_key 则从草稿声明的一个参数向下传入:
apiVersion: aggrega.ai/v1beta1kind: Aggregatemetadata: name: imported/support-assistant version: 0.1.0 description: Draft Aggregate imported from a source in the dify format.spec: parameters: secret_key: type: string required: true minLength: 1 description: "Passed down to core/dify's secret_key parameter, which has no default; that parameter's description in core/dify says what the value is." aggregates: # An import sees the Components of the workspace's catalog and none of its Aggregates, so it does not check that the catalog holds core/dify. dify: type: core/dify parameters: secret_key: "{{ .parameters.secret_key }}" app_definition: | app: description: Answers questions about the support plans of a small software company. [… omitted: the rest of the application, as exported] version: 0.7.0该安装由十个相互连接的组件组成——Dify 的 API 服务器、工作进程、调度器、Web 前端、代码沙箱、插件运行时、一个出口代理、PostgreSQL、一个兼容 Redis 的缓存以及 Weaviate——而应用的导入是其 API 服务器的 Recipe 所渲染的一个步骤。其应用密钥在 core/dify 中没有默认值,因此草稿将 secret_key 声明为自己的参数,不设默认值,并将其向下传递,由 Release 来满足。该安装的其他凭据保留 core/dify 为其提供的默认值,如运行所述。
release.yaml——Release,它将安装路由到边界 platform 中,并从应答文件中满足应用无法提供的内容:
apiVersion: aggrega.ai/v1beta1kind: Releasemetadata: name: imported/support-assistant # environment is a drafted default, since no source names the environment this Release deploys to; change it to name the one it deploys to. environment: development version: 0.1.0 description: Draft Release imported from a source in the dify format.spec: aggregate: imported/support-assistant manifest: imported/support-assistant parameters: # Left for the Release, since the source cannot supply it: secret_key, which the drafted Aggregate declares and passes down to core/dify; that parameter's description there says what the value is secret_key: "dify-credentials" boundaries: platform: aggregates: dify: components: api: infra: # Lets the installation reach Dify's plugin marketplace, which the plugin serving the application's model, such as OpenAI's, is installed from. marketplace_enabled: true # Left for the Release, since the source cannot supply it: components.api.infra.owner_email, the email of the installation's owner account the application is imported under, on the api component of core/dify owner_email: "owner@example.com" features: owner_password: type: core/referenced-secret infra: # Left for the Release, since the source cannot supply it: the name of a Kubernetes Secret already in the namespace holding, under the data key value, the owner account's password. origin: "dify-owner" worker: infra: # Lets the installation reach Dify's plugin marketplace, which the plugin serving the application's model, such as OpenAI's, is installed from. marketplace_enabled: true scheduler: infra: # Lets the installation reach Dify's plugin marketplace, which the plugin serving the application's model, such as OpenAI's, is installed from. marketplace_enabled: trueenvironment为development,这是一个默认值,其上方的注释说明应将其改为该 Release 所部署到的环境。secret_key是保存应用密钥的 Secret 的名称dify-credentials,位于安装所指定的数据键secret-key下:Manifest 从命名空间中已有的 Secret 读取每个凭据。- 所有者账户设置在安装的
api组件上,位于将安装放入其边界的路由条目中:其电子邮件地址,以及作为core/referenced-secret附加的密码,后者指向在数据键value下保存密码的 Secretdify-owner。已应答的值上方的注释说明了导入为何无法起草它们。 marketplace_enabled在 API 服务器api、其 worker 和其调度器上都为true,且适用于每个目标:除非 Release 允许,否则该安装不会访问 Dify 厂商的任何内容,而应用所回答的 OpenAI 提供商是 Dify 从其插件市场安装的插件,如测试所示。三者各自读取自己的设置。
manifest.yaml——安装所组合的每个组件各有一个 Helm Recipe,以及从命名空间中已有的 Secret 读取凭据的实现:
apiVersion: aggrega.ai/v1beta1kind: Manifestmetadata: name: imported/support-assistant version: 0.1.0spec: mappings: components: type: core/datastore/postgres: helm/postgres core/datastore/redis: helm/redis core/datastore/weaviate: helm/weaviate core/ai-agent/dify-ssrf-proxy: helm/dify-ssrf-proxy core/ai-agent/dify-sandbox: helm/dify-sandbox core/ai-agent/dify-plugin-daemon: helm/dify-plugin-daemon core/ai-agent/dify: helm/dify core/ai-agent/dify-worker: helm/dify-worker core/ai-agent/dify-worker-beat: helm/dify-worker-beat core/ai-agent/dify-web: helm/dify-web features: type: core/referenced-secret: helm/k8s-existing-secret--target 既映射草稿所组合的安装的组件类型,也映射草稿自身的组件类型。当目录为一种类型提供多个 Helm Recipes 时(如 PostgreSQL),它映射以该类型命名的那个,即 helm/postgres。
.aggrega-import.json 记录了导入所写入的内容,供之后的 aggrega import --sync 读取;release.lock 按版本和摘要锁定该 Release 所解析到的每个目录实体。
验证并构建
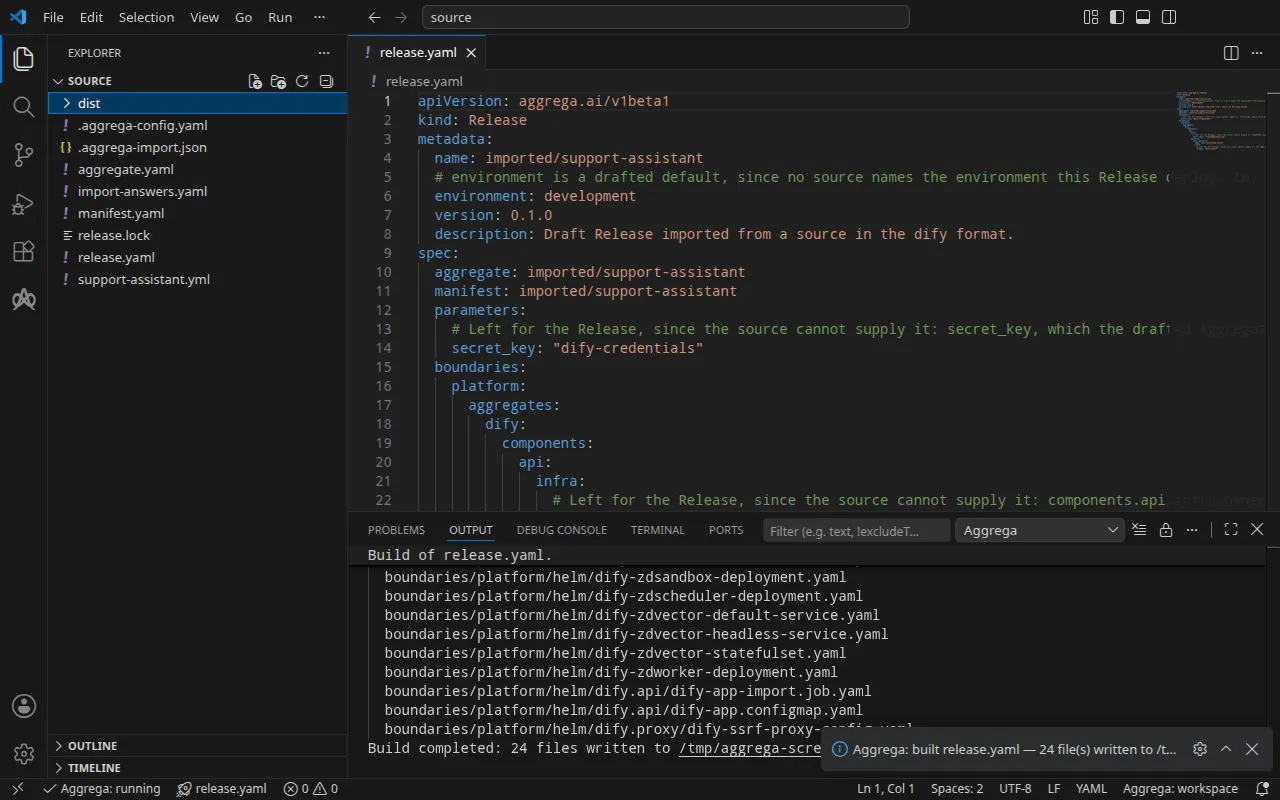
aggrega validate --release release.yamlaggrega build --release release.yaml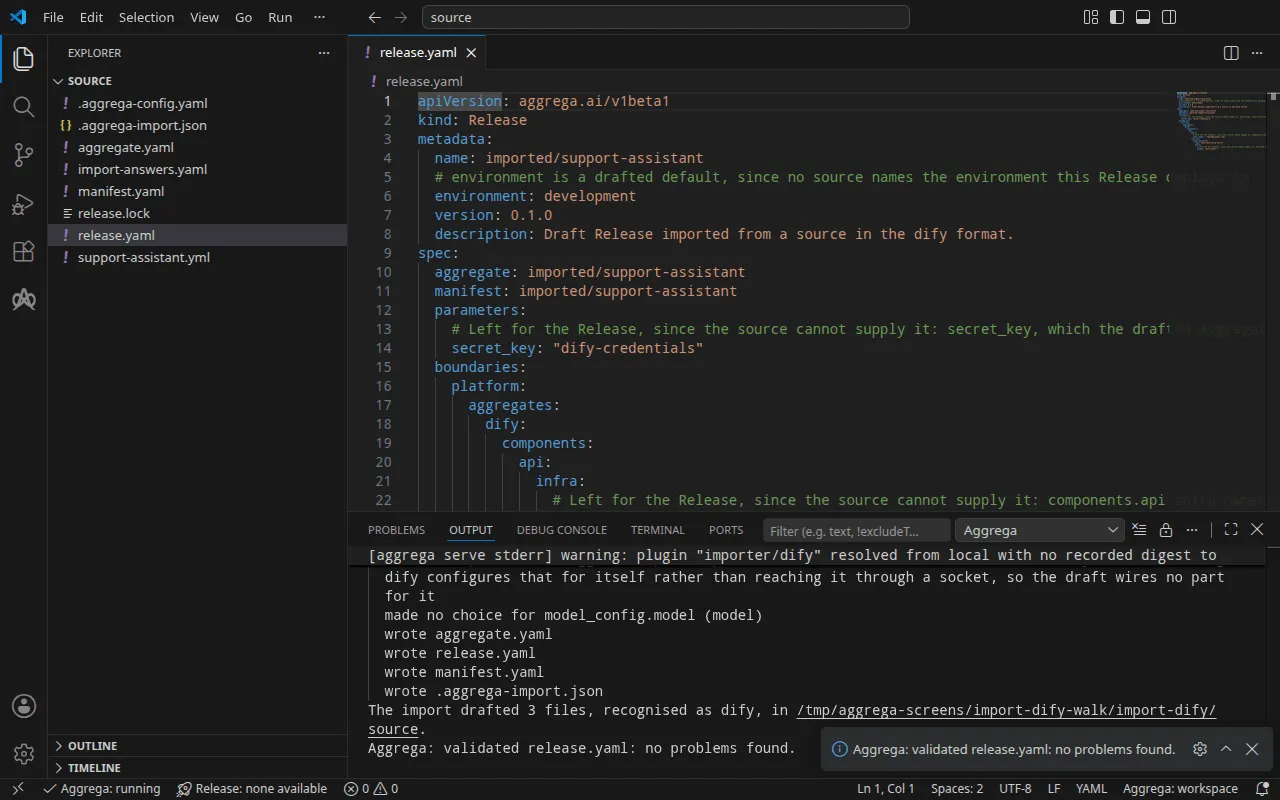
验证打印:
notice: LINT: Feature "core/referenced-secret" at core/referenced-secret:1.0.0 declares property "origin" in both values: and infra: pillars (path: origin)release dependency validation passed: release.yaml (schema-pillar + dependency pillars)以及构建,其中 <workspace> 代表包含草稿的文件夹:
notice: LINT: Feature "core/referenced-secret" at core/referenced-secret:1.0.0 declares property "origin" in both values: and infra: pillars (path: origin)[… omitted: a total build time, which differs per run]Build completed: 24 files written to <workspace>/distnotice 行仅供参考:机密 Feature 从 Aggregate 的 values 或 Release 的 infra 接受其 origin,该通知报告有一个叶节点在两者中都有声明。它不会改变任何判定结果。
构建会将安装的 Kubernetes 清单写入 dist/boundaries/platform/helm/ 下。其中包括导入应用的 Job,即 dify.api/dify-app-import.job.yaml。它会等待 Dify 的 API 服务器响应,在尚未执行首次设置时以 Release 指定的所有者账户执行 Dify 的首次设置,然后导入应用:
spec: podFailurePolicy: rules: - action: FailJob onExitCodes: containerName: import operator: In values: [2] template: spec: restartPolicy: Never containers: - name: import image: "langgenius/dify-api:1.17.0" command: ["python", "/seed/import.py"] env: - name: DIFY_API_URL value: "http://dify-zdapi-default:5001" - name: OWNER_EMAIL value: "owner@example.com" - name: OWNER_PASSWORD valueFrom: secretKeyRef: name: "dify-owner" key: "value" volumeMounts: - name: seed mountPath: /seed readOnly: true volumes: - name: seed configMap: name: dify-zdapi-app应用本身位于旁边的 ConfigMap 中。当 Dify 拒绝该步骤发送的内容时——无论是返回请求超时或速率限制以外的客户端错误响应,还是报告导入失败——该步骤会打印 Dify 响应中携带的消息并以状态 2 退出,与定义在 app.name 下未指明任何应用时的做法相同;Job 的 podFailurePolicy 会让 Job 在该次尝试时失败,因为重试也会以同样方式被拒绝;其他任何失败,例如服务器在大约十分钟内没有响应,都会重试。
借助 AI 助手
配置了 Aggrega 工具的 AI 助手也可以完成同样的操作:将下面的提示词粘贴给它。
只使用 Aggrega 工具,不要自己创建任何文件夹。如果 Workspace 文件夹中还没有 `import-dify` 文件夹,调用一次 `scaffold` 工具,将 `example` 设为 `import-dify`,不设置 `dir`:它会把示例写入一个新的 `import-dify` 文件夹,其中的 `source` 文件夹包含本页导入的内容。然后调用 `import` 工具,将 `workspace_root` 设为 `import-dify/source`,`source` 设为 `support-assistant.yml`,`target` 设为 `helm`:它会从 `support-assistant.yml` 旁边的 `import-answers.yaml` 读取所需的答案,将草稿写入 `import-dify/source`,并拉取草稿所需的内容。然后调用 `validate` 工具,将 `workspace_root` 设为 `import-dify/source`,`release` 设为 `release.yaml`;再调用 `build` 工具,将 `workspace_root` 设为 `import-dify/source`,`release` 设为 `release.yaml`,`write` 设为 true。告诉我构建写入了哪些文件;它们位于 `import-dify/source/dist/` 下。在 VS Code 中打开
安装 Aggrega 的 Visual Studio Code 扩展后,在 VS Code 中打开文件夹 import-dify/source,导入就把草稿写在这里。该文件夹只包含一个 Release,即草拟的 release.yaml,因此编辑器会替你选中它;当 在 Docker Compose 上 将第二个 Release 草拟到 compose 中之后,用 Aggrega: Select Release… 选择编辑器要处理的那个。编辑器会在你编辑草稿时对照所选 Release 检查它们,把发现的问题标记在文件中和“问题”面板中。命令面板中的 Aggrega: Show topology graph 会绘制所选 Release 的组件及它们之间的连接。Aggrega: Build、Aggrega: Preview build 和 Aggrega: Pull 作用于同一个 Release,并且每一个也是活动栏中 Aggrega 视图的 Commands 面板上的一个按钮;Build 把文件写入该文件夹的 dist/。其余内容见 在 Visual Studio Code 中使用 Aggrega。
运行
在应用这些清单之前,先创建它们读取的 Secret。引用不存在的 Secret 的工作负载不会启动。其中两个保存答案文件所指定的内容:dify-owner,在 value 下保存所有者的密码;以及 dify-credentials,在 secret-key 下保存应用的密钥。该安装的其余四项凭据——它的数据库密码以及其各组件相互出示的三个密钥——保留 core/dify 赋予它们的默认值,而在 Kubernetes 上,每个默认值就是清单从中读取它的 Secret 的名称:dify-db-password-for-evaluation-only,位于 db-password 下;dify-code-execution-key-for-evaluation-only,位于 code-execution-key 下;dify-plugin-daemon-key-for-evaluation-only,位于 plugin-daemon-key 下;以及 dify-inner-api-key-for-evaluation-only,位于 inner-api-key 下。也创建这四个 Secret,每个都保存你自己的值;若要从其他名称的 Secret 中读取它们,请在 Aggregate 的 dify 条目中、parameters 之下,将这些名称以 db_password、code_execution_key、plugin_daemon_key 和 inner_api_key 传给 core/dify。
在你的 shell 中将所有者的密码设置为 DIFY_OWNER_PASSWORD,因为下文要用它登录。Dify 接受的所有者密码至少有八个字符,且包含一个字母和一个数字:若给出其他密码,导入 Job 会在 Dify 拒绝初始设置时立即失败,其日志显示 first-time setup was refused with HTTP 422: Validation error for parameter 'payload',这是 Dify 对其拒绝的所有者账户给出的回复。下文的等待会等待 Job 完成,而失败的 Job 永远不会完成,因此这时它会一直持续到超时;在旁边的第二个终端中运行 kubectl wait --for=condition=failed job/dify-zdapi-app-import --timeout=15m,该等待会在 Job 失败时立即返回。删除该 Job 和 dify-owner Secret,用 Dify 接受的密码重新创建该 Secret,然后再次应用。
为其余五个 Secret 各编写一个文件,每个文件一行:数据键、= 和你自己的值——dify-credentials.env 写 secret-key=,db-password.env 写 db-password=,code-execution-key.env 写 code-execution-key=,plugin-daemon-key.env 写 plugin-daemon-key=,inner-api-key.env 写 inner-api-key=。然后创建这六个 Secret。此后这些值由集群保存,因此删除这些文件:
printf 'value=%s\n' "$DIFY_OWNER_PASSWORD" > dify-owner.envkubectl create secret generic dify-owner --from-env-file=dify-owner.envkubectl create secret generic dify-credentials --from-env-file=dify-credentials.envkubectl create secret generic dify-db-password-for-evaluation-only --from-env-file=db-password.envkubectl create secret generic dify-code-execution-key-for-evaluation-only --from-env-file=code-execution-key.envkubectl create secret generic dify-plugin-daemon-key-for-evaluation-only --from-env-file=plugin-daemon-key.envkubectl create secret generic dify-inner-api-key-for-evaluation-only --from-env-file=inner-api-key.envrm dify-owner.env dify-credentials.env db-password.env code-execution-key.env plugin-daemon-key.env inner-api-key.env按照 导入如何运行 的运行步骤所述应用清单——-R 会覆盖 dify.api/ 和 dify.proxy/ 中的 Job 和两个 ConfigMap——然后等待导入 Job 并读取其日志,再等待插件运行时:
kubectl apply -R -f dist/boundaries/platform/helm/kubectl wait --for=condition=complete job/dify-zdapi-app-import --timeout=15mkubectl logs job/dify-zdapi-app-importkubectl rollout status statefulset/dify-zdpluginsservice/dify-zdapi-default createddeployment.apps/dify-zdapi created[… omitted: a line for each of the other Services, Deployments and StatefulSets]job.batch/dify-zdapi-app-import createdconfigmap/dify-zdapi-app createdconfigmap/dify-zdproxy-config createdjob.batch/dify-zdapi-app-import condition metfirst-time setup done: owner account owner@example.comimported 'Support assistant' as application 7e03e85c-b13f-4ddc-b539-040470a61d4cpartitioned roll out complete: 1 new pods have been updated...日志中给出了应用的标识符,测试 需要用到它。
测试
Dify 的 API 在 http://127.0.0.1:5001 上响应。在 Kubernetes 上,将一个本地端口转发到你所应用的命名空间中 API 服务器的 Service dify-zdapi-default,并让该命令在第二个终端中保持运行:
kubectl port-forward -n <namespace> svc/dify-zdapi-default 5001:5001在 Docker Compose 上,按 在 Docker Compose 上 所示启动后,Release 已经在该地址发布了 API,并在 http://127.0.0.1:3001 发布了控制台。打开控制台的登录页面 http://127.0.0.1:3001/signin;/ 会重定向到那里。页面将请求发送到 http://127.0.0.1:5001 上的 API,而 Dify 的 API 只为从草拟的 console_url 所指定的地址 http://127.0.0.1:3001 提供的页面响应浏览器,因此请在那里以所有者身份登录。若在任何其他地址打开控制台,其请求得不到这样的响应,浏览器会拒绝每一个回复;如需在另一个端口发布控制台,请同时修改 console_url。
应用也通过 API 响应,无需浏览器参与。在已设置 DIFY_OWNER_PASSWORD 的终端中,以所有者身份登录。控制台 API 接受经 Base64 编码的密码,登录后会话保存在 cookies.txt 中。之后的每个控制台请求都会回传该会话,并在 X-CSRF-Token 标头中携带同一文件中的 CSRF 令牌;缺少该令牌的请求会被拒绝,并返回 CSRF token is missing or invalid.
printf '{"email": "owner@example.com", "password": "%s"}' "$(printf %s "$DIFY_OWNER_PASSWORD" | base64 | tr -d '\n')" | curl -sS -c cookies.txt http://127.0.0.1:5001/console/api/login -H 'Content-Type: application/json' -d @-CSRF=$(awk '$6 == "csrf_token" {print $7}' cookies.txt){"result":"success"}Dify 的模型提供方是插件,新安装中不包含任何插件。安装 Dify 的 OpenAI 提供方,版本为 1.1.0,即本次运行所安装的版本;插件运行时会从 Dify 的市场获取它,草拟的 marketplace_enabled 让该安装能够访问这个市场,因此该安装必须能够访问互联网:
curl -sS -b cookies.txt -H "X-CSRF-Token: $CSRF" -H 'Content-Type: application/json' \ http://127.0.0.1:5001/console/api/workspaces/current/plugin/install/marketplace \ -d '{"plugin_unique_identifiers": ["langgenius/openai:1.1.0@1ded02acee56efd5788c86fd447d792e4923e959554a4942f440c7859d164340"]}'{"all_installed":false,"task_id":"01a1dc0a-653d-756b-a104-e5d6d1e43695","task":null}如果从 Release 中删除 marketplace_enabled,Dify 则会拒绝该请求,并返回 {"code":"invalid_param","message":"marketplace is not enabled","status":400}。安装在后台运行。使用回复中给出的 task_id 查询其任务,直到其 status 为 success:
curl -sS -b cookies.txt -H "X-CSRF-Token: $CSRF" \ http://127.0.0.1:5001/console/api/workspaces/current/plugin/tasks/<task id>{"task":{"id":"01a1dc0a-653d-756b-a104-e5d6d1e43695",[… omitted: when it was created and last updated],"status":"success","total_plugins":1,"completed_plugins":1,"plugins":[{"plugin_unique_identifier":"langgenius\/openai:1.1.0@1ded02acee56efd5788c86fd447d792e4923e959554a4942f440c7859d164340",[… omitted: the plugin's status, its icon and its names in four languages]}]}}将提供方的密钥写入 openai.json,形式为 {"credentials": {"openai_api_key": "your OpenAI key"}},设置它,然后删除该文件:
curl -sS -b cookies.txt -H "X-CSRF-Token: $CSRF" -H 'Content-Type: application/json' \ http://127.0.0.1:5001/console/api/workspaces/current/model-providers/langgenius/openai/openai/credentials \ -d @openai.jsonrm openai.jsonDify 在保存密钥之前,会向提供方发出一次请求来检查它,对于提供方接受的密钥,会返回 {"result":"success"}。本次运行设置了一个占位值,Dify 以 OpenAI 的回答拒绝了它:
{"code":"invalid_param","message":"Error code: 401 - {'error': {'message': 'Incorrect API key provided: sk-place*****************-key. You can find your API key at https:\/\/platform.openai.com\/account\/api-keys.', 'type': 'invalid_request_error', 'code': 'invalid_api_key', 'param': None}, 'status': 401}","status":400}应用响应使用其自身 API 密钥发出的请求。使用导入应用的那一步的日志中的应用标识符创建一个密钥——在 Docker Compose 上为 docker compose -p support-assistant -f ../dist/boundaries/platform/compose/docker-compose.yaml logs dify-zdapi-app-import:
curl -sS -X POST -b cookies.txt -H "X-CSRF-Token: $CSRF" \ http://127.0.0.1:5001/console/api/apps/<application id>/api-keys{"id":"8d6c1eb1-cf61-4825-9b04-f32689ed0489","type":"app","token":"[… omitted: the key]","last_used_at":null,"created_at":1794693042}然后使用该密钥,即回复中的 token,向应用发送一条消息:
curl -sS http://127.0.0.1:5001/v1/chat-messages \ -H 'Authorization: Bearer <app key>' -H 'Content-Type: application/json' \ -d '{"inputs": {}, "query": "In one short sentence: what does a support plan cover?", "response_mode": "blocking", "user": "test-it"}'由于占位值被拒绝,模型没有密钥,Dify 会如实说明:
{"code":"provider_not_initialize","message":"Model gpt-4o-mini credentials is not initialized.","status":400}在 Kubernetes 和 Docker Compose 上的运行得到了相同的回复。使用提供方接受的密钥时,回复会在 answer 中携带模型的回答。
在 Kubernetes 上,停止端口转发,然后删除你应用的内容、这些 Secret 以及会话文件:
kubectl delete -R -f dist/boundaries/platform/helm/kubectl delete secret dify-owner dify-credentials dify-db-password-for-evaluation-only dify-code-execution-key-for-evaluation-only dify-plugin-daemon-key-for-evaluation-only dify-inner-api-key-for-evaluation-onlykubectl delete pvc data-dify-zddb-0 storage-dify-zdplugins-0 data-dify-zdvector-0rm cookies.txt删除 StatefulSet 时,Kubernetes 会保留该 StatefulSet 创建的卷声明,因此第三条命令会删除它们,连同数据库、已安装的插件和向量存储一并删除。在 Docker Compose 上,docker compose -p support-assistant -f ../dist/boundaries/platform/compose/docker-compose.yaml down -v 会删除该栈及其卷。
在 Docker Compose 上
同一个应用可通过 compose 目标、使用同一个答案文件为 Docker Compose 导入。面向 Kubernetes 的草稿已经位于 source 中,因此请用 --output-dir 将面向 Compose 的草稿写入单独的文件夹;导入仍会读取应用旁边的答案文件:
aggrega import support-assistant.yml --target compose --output-dir composeDocker Compose 没有可指定的 Secret,因此对于 compose,草稿会自行写入应用密钥和所有者密码,每一个都写成变量引用,由 Docker Compose 从启动栈的人的环境中填入。在那里只需要所有者的邮箱。导入会将两个 Secret 名称保留在答案文件中但不应用它们,并在标准错误中说明这一点:
info: the answers file <workspace>/import-answers.yaml also answers spec.boundaries.platform.aggregates.dify.components.api.features.owner_password.infra.origin in release.yaml, spec.parameters.secret_key in release.yaml, which these drafts do not leave empty; those answers are kept there and not applied起草的 Release 从 DIFY_SECRET_KEY 读取应用密钥,从 DIFY_OWNER_PASSWORD 读取所有者密码,并在回环地址的端口 5001 上发布 API,在 3001 上发布前端 console:
parameters: # Passed by reference, never as a value: secret_key, which the drafted Aggregate declares and passes down to core/dify; that parameter's description there says what the value is; it is read from the variable DIFY_SECRET_KEY, which a target substituting variable references, as Docker Compose does when the stack starts, reads from the environment, so no file carries the value. secret_key: "${DIFY_SECRET_KEY}" [… omitted: the boundary, the marketplace switch, and the owner's email, answered as above] # Published on this machine's loopback address, 127.0.0.1: reachable from this machine only, by any process running on it. Delete this line to keep the service internal. published_port: 5001 console_url: "http://127.0.0.1:3001" features: owner_password: type: core/referenced-secret infra: # Attached by reference, never as a value: the owner account's password, read from the variable DIFY_OWNER_PASSWORD, which a target substituting variable references, as Docker Compose does when the stack starts, reads from the environment, so no file carries the value. origin: "${DIFY_OWNER_PASSWORD}" [… omitted: the worker and the scheduler, each with the marketplace switch, as above] console: infra: # Published on this machine's loopback address, 127.0.0.1: reachable from this machine only, by any process running on it. Delete this line to keep the service internal. published_port: 3001如注释所述,每个端口都只能从你的机器访问,删除一行即可让该服务只留在栈的网络中。前端在其容器内监听 3000,并发布在 3001 上,因此可以与另一个发布 3000 的示例并行运行。API 服务器的 console_url 是前端发布所在的地址,因此你为前端更改的端口也要在那里一并更改。
Manifest 将每个组件映射到其 Compose Recipe,并将 core/referenced-secret 映射到 compose/dotenv-referenced-secret,后者将每个引用按原样写入 Compose 文件。在新文件夹中验证并构建:
cd composeaggrega validate --release release.yamlaggrega build --release release.yaml构建会写入工作区根目录下的 dist,而工作区仍然是 source,即包含 .aggrega-config.yaml 的文件夹:Compose 文件是 source/dist/boundaries/platform/compose/docker-compose.yaml,从 compose 看是 ../dist/boundaries/platform/compose/docker-compose.yaml,compose 内不会写入 dist 文件夹。该文件包含 SECRET_KEY: ${DIFY_SECRET_KEY} 和 OWNER_PASSWORD: ${DIFY_OWNER_PASSWORD},而不是这两个值本身。在启动栈之前,请在你的 shell 中,或在 Compose 文件旁边的 .env 文件中设置这两个变量。
安装的其他四个凭据保留 core/dify 为其提供的默认值,而在 Docker Compose 上,每个默认值就是值本身,按原样写入 Compose 文件:DB_PASSWORD: dify-db-password-for-evaluation-only,数据库上的 POSTGRES_PASSWORD 与之相同,dify-code-execution-key-for-evaluation-only、dify-plugin-daemon-key-for-evaluation-only 和 dify-inner-api-key-for-evaluation-only 也是如此。每个阅读目录的人都知道这些默认值,因此它们只适用于评估。要替换其中一个,请在起草的 Aggregate 中为其声明一个字符串参数,在 dify 条目的 parameters 中以 core/dify 为其使用的名称——db_password、code_execution_key、plugin_daemon_key 或 inner_api_key——向下传递,就像草稿传递 secret_key 那样,并在 Release 的 parameters 下满足它。写有 db_password: "${DIFY_DB_PASSWORD}" 的 Release 会构建出包含 DB_PASSWORD: ${DIFY_DB_PASSWORD} 和 POSTGRES_PASSWORD: ${DIFY_DB_PASSWORD} 的 Compose 文件,它们会像上面两个一样从环境中填入。
在 compose 中启动栈,使用 Dify 接受的所有者密码,如 运行 所述:
export DIFY_SECRET_KEY='a long random value of your own'export DIFY_OWNER_PASSWORD='a password of your own'docker compose -p support-assistant -f ../dist/boundaries/platform/compose/docker-compose.yaml up -d --wait在本次运行中,--wait 大约一分钟后返回,此时每个服务器都已报告健康。导入应用的那一步与它们并行运行,完成导入后退出;其日志随后显示:
first-time setup done: owner account owner@example.comimported 'Support assistant' as application 7fae73f4-826b-4918-a623-a3383aa0da8c测试 通过两个已发布的端口访问该安装。